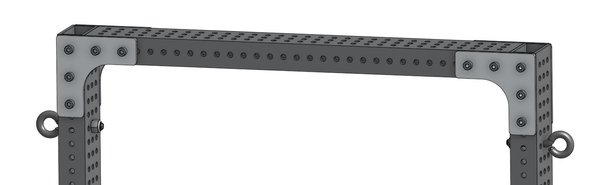
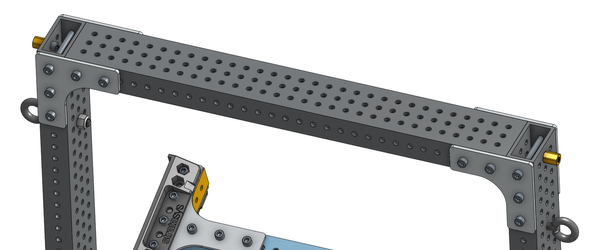
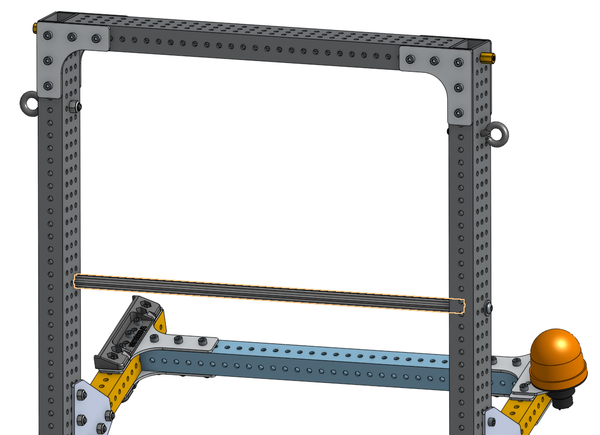
Superstructure
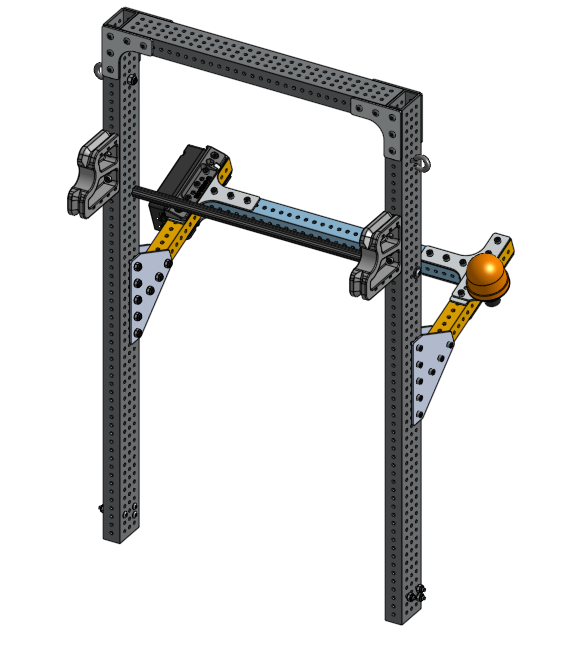
The Superstructure hosts both the Algae Intake and the Coral Basket. Additionally it hosts the RSL and the Robot Radio. There is a backstop, needed only if using the deep climber, that prevents the anchor from hitting the Superstructure by limiting the movement of the cage. Finally there are 3D printed hardstops to prevent the Algae Intake roller from moving too far into the Coral Basket.
Required Tools
- ⅜” Wrench/Socket
- 5/32” Allen Key
- #7 Drill bit
- ¼” Drill bit
- 10-32 tap for hex shaft or ¼-20 tap for churro
- Band Saw/Chop Saw or other metal cutting device
- Drill press (preferred) or hand drill
- 3D printed jig if box tube is not patterned
Superstructure Materials
You will need:
- Qty(~36) x 1.5” 10-32 Socket Head Bolts
- Qty(14) x 2.5” 10-32 Socket Head Bolts
- Qty(~50) x 10-32 Nylock Nuts
- Qty(4) x Back Angle Plate (70 degree KitBot plates)
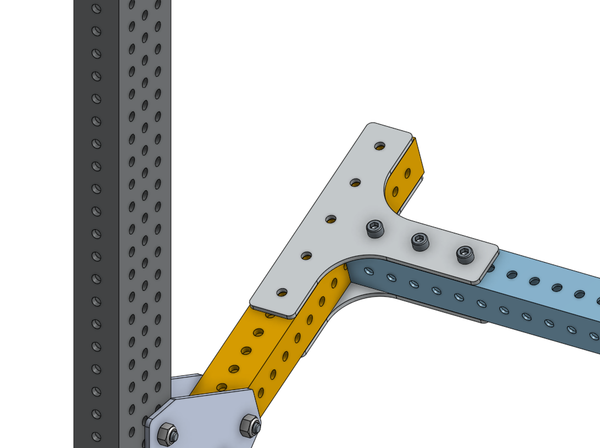
- Qty(4) x T-Bracket (comes with the KitBot)
- Qty(1) x RSL Mount (comes with the KitBot)
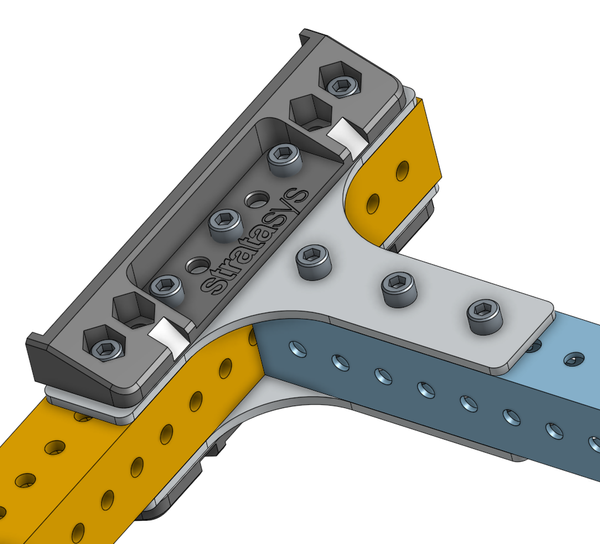
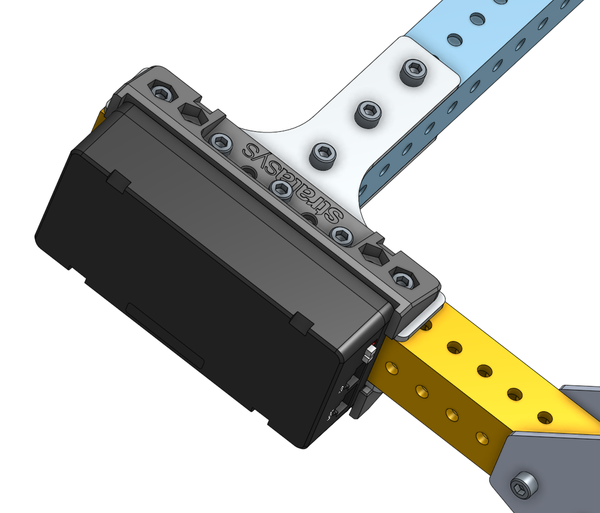
- Qty(1) x Radio Mount (comes with the KitBot)
- Qty(4) x 1” L (90 degree) Gusset
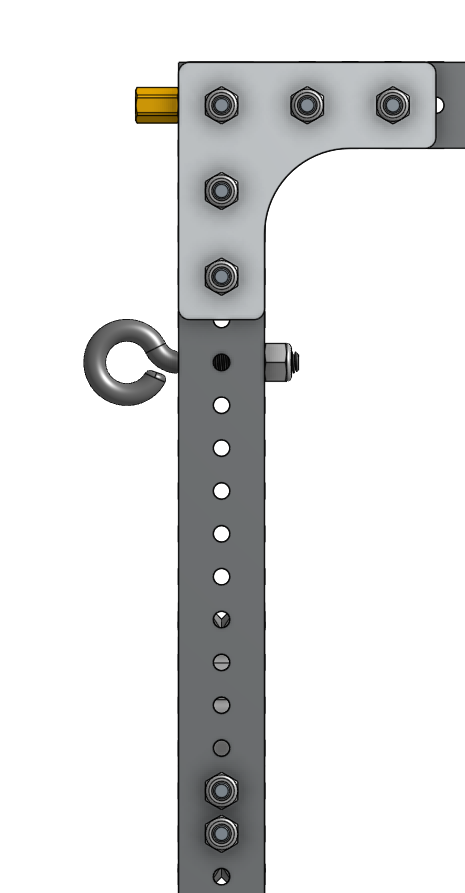
- Qty(2) x 1/4"-20 Eye Bolts - 2 5/8"
- Qty(2) x ¼”-20 1.25” thread forming screws (will be 10-32 if using hex shaft instead of churro)
You will be making:
- Qty(1) x 16” Churro or 16” 1/2" Hex Shaft tapped on both ends
- Qty(2) x 03_Superstructure_3DP_HardStop (3D printed on your own)
- Qty(2) x 03_Superstructure_Upright 31” 2x1 box tube
- Qty(1) x 03_Superstructure_Crossmember 16” 2x1 box tube
- Qty(2) x 03_Superstructure_Cage_Hardstop_Support 10” 1x1 box tube
- Qty(1) x 03_Superstructure_Cage_Hardstop 16” 1x1 box tube
Superstructure Machining
Start by cutting all the stock to length, from your 2x1 you will need:
- Two 31” 03_Superstructure_Uprights
- One 16" 03_Superstructure_Crossmember
For 1x1:
- Two 10” 03_Superstructure_Cage_Hardstop_Support
- One 16” 03_Superstructure_Cage_Hardstop
You will need to cut one churro to 16” to serve as the backstop for the Algae.
Additionally you will need to 3D print two 03_Superstructure_3DP_HardStop
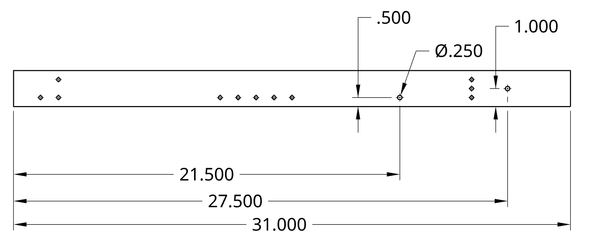
03_Superstrucutre_Uprights
The 03_Superstructure_Uprights will need the following holes using a #7-#10 or 13/64” drill bit (#7 preferred). We highly recommend using the drill guide throughout this whole process. For the bottom holes that are offset 1.5” and 2.5” from the end of the tube you will need to do one of two things:
- Square the guide against the tube, add the holes, then remove ~1/16” from the tube so it does not interfere with the chassis rail bottom
- Offset the guide so it does will produce holes ~1/16” lower than if it were squared against the guide
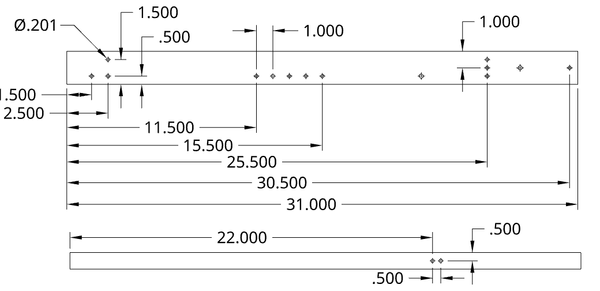
After making the #7 holes, you will need to make the following ¼” holes. The location of these holes does not have to be absolutely perfect, the upper hole is for an eye bolt and the lower hole is the backstop for the Algae.
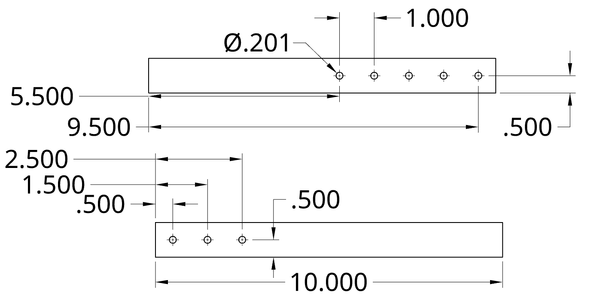
03_Superstructure_Supports
All holes can be made with a #7 drill bit. If you do not have the drill guides or patterned box tube, you can use gussets to match drill the holes.
Superstructure Assembly
Start by attaching the 03_Superstructure_Upright to the chassis using a minimum of three 10-32 1.5” bolts with Nylock nuts inside the chassis rail. These will go on the battery side. Be careful not to crush the box tube when tightening the bolts, having some sort of crush spacer would be prudent. It will be mounted 6 bolt holes in when counting from the top of the inside rail. Mount the other side in the same manor.
Next we will look at attaching the L gussets to the top of the 03_Superstructure_Upright using ten 10-32 2.5” bolts. Do your best to square the gusset to the top of the tube, then clamp it down and drill out some holes all the way through the tube with a #7 drill bit. When one hole is completed place a bolt into the hole to better constrain the gusset.
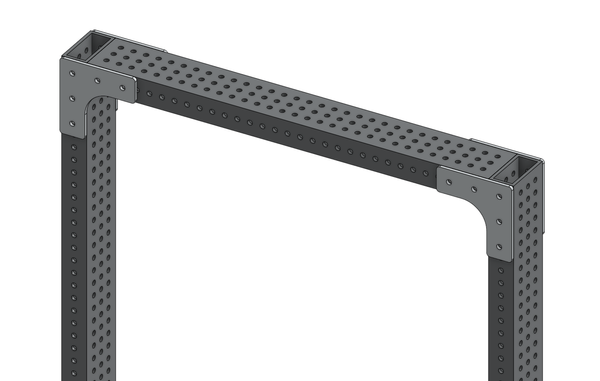
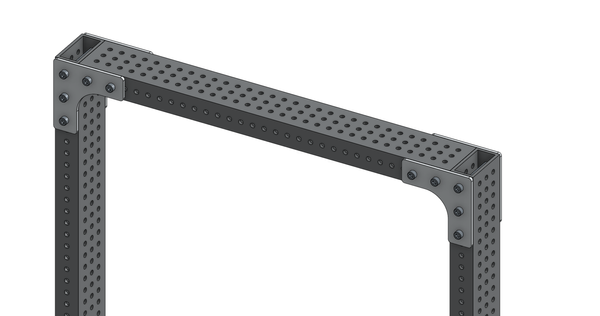
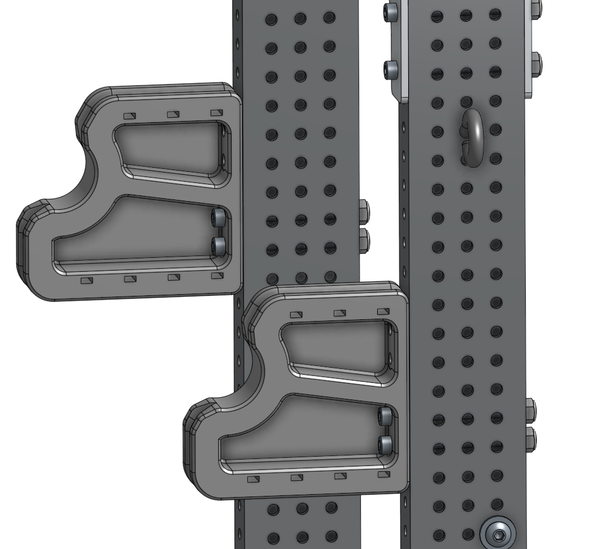
Now, we can connect the KitBot 70° gussets for the Cage hard stop. Using up to ten 10-32 1.5” bolts and Nylock nuts, attach the gussets to the Superstructure 2x1. It may be best to attach the 03_Superstructure_Cage_Hardstop_Support 1x1 simultaneously using an additional six 10-32 1.5” bolts.
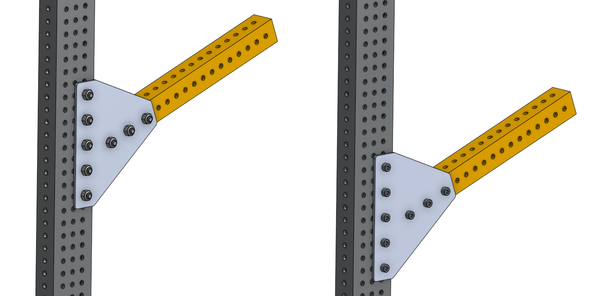
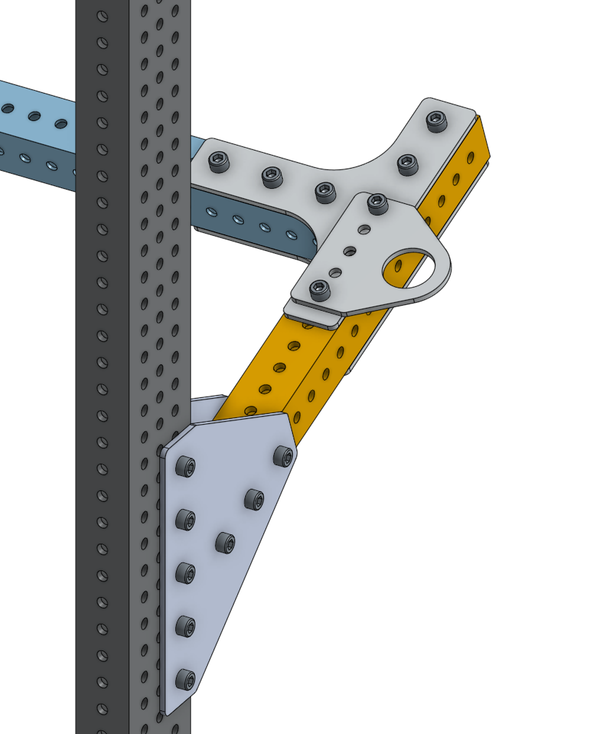
To finish up the Cage Hard Stop, we need to attach the 03_Superstructure_Cage_Hardstop using the KitBot T-Brackets. First, using seven 10-32 1.5” bolts and Nylock nuts. Make sure to layer the RSL bracket (KB-25005) over the bottom holes of the T-Bracket on the 03_Superstructure_Cage_Hardstop_Support.
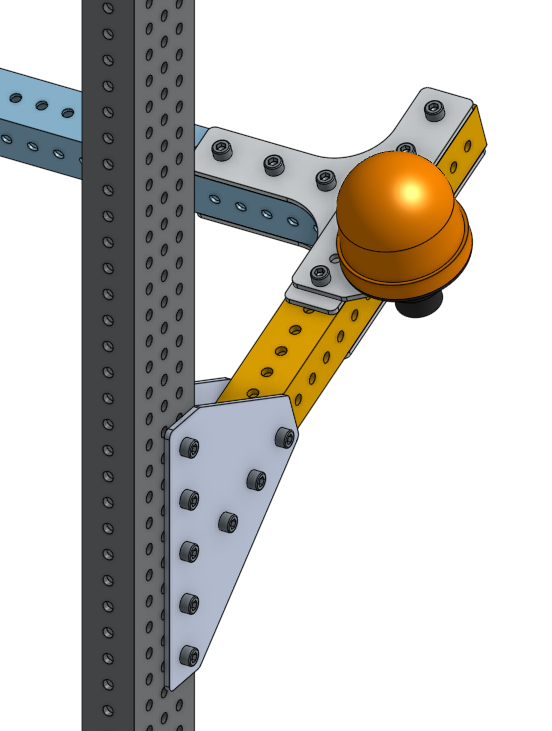
Over on the other side, we will use three more 10-32 1.5” bolts and Nylock nuts, attach the T-Brackets to the 03_Superstructure_Cage_Hardstop.
Finally, using five 10-32 1.75” bolts and Nylock nuts attach the 3D printed Radio mount (KB-25014) from the KitBot on both sides of theT-Brackets on the 03_Superstructure_Cage_Hardstop_Support.
Now we can attach the Eye Bolts with the supplied nuts. If using patterned box tubes, they should be mounted in the 7th from the top center hole on both 03_Superstructure_Uprights.
Next, we can use two 10-32 1.75” bolts and two 10-32 0.5” Standoffs and mount them to the top center hole in the 03_Superstructure_Upright. These standoffs will help keep the angle of the Coral Mechanism Side Plates.
Using the 16” Churro or Hex Shaft that has been tapped on both ends, we will mount it in the back row of holes in the patterned box tube, 21 holes down. If you are using a hex shaft you will need to tap the hex for 10-32 and the churro will require ¼-20 The hardware used depends on the shaft stock selected. Regardless of what you choose, we recommend using a washer on the bolt.
Finally, we will mount the Algae Intake hardstops, 03_3DP_Hardstop, using the bottom two holes of the part. Use four 10-32 2.5” bolts and Nylock nuts through the 17th and 18th holes from the top of the 03_Superstructure_Upright. Be careful not to overtighten these bolts as they may damage the 3D prints.