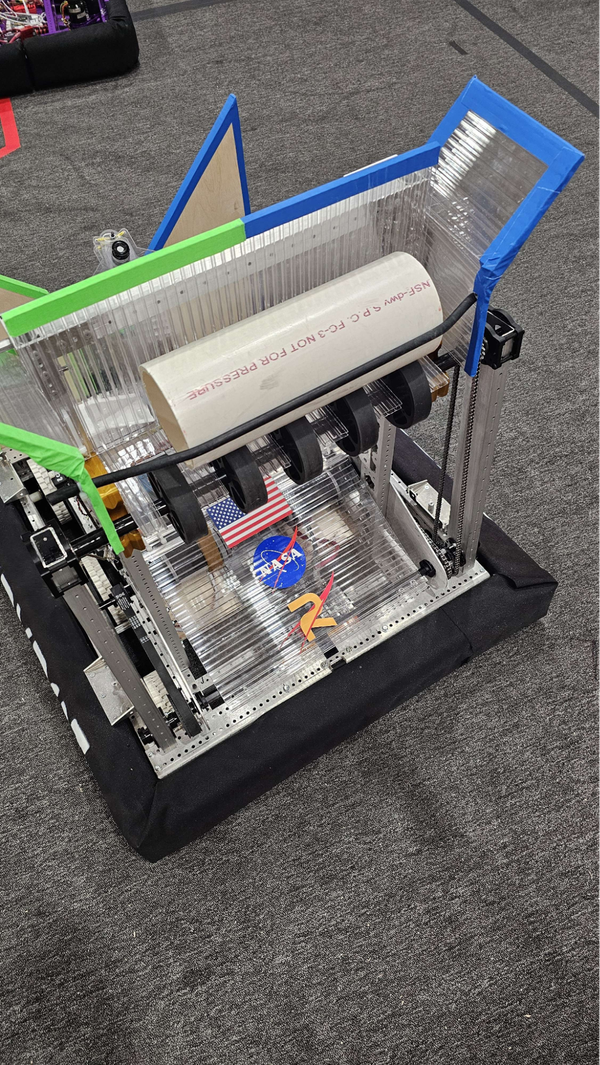
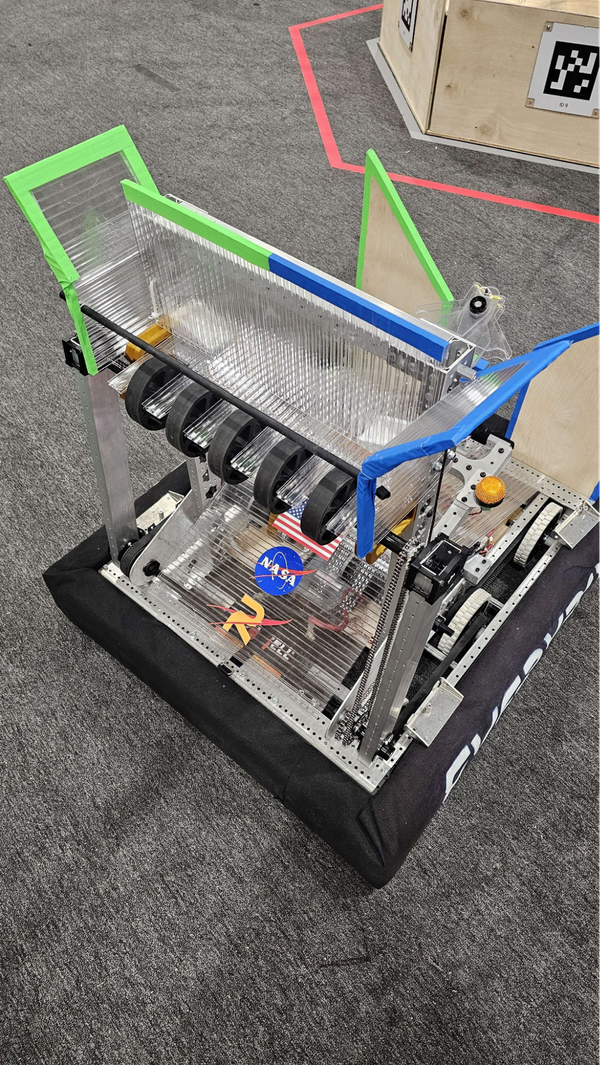
Coral Basket
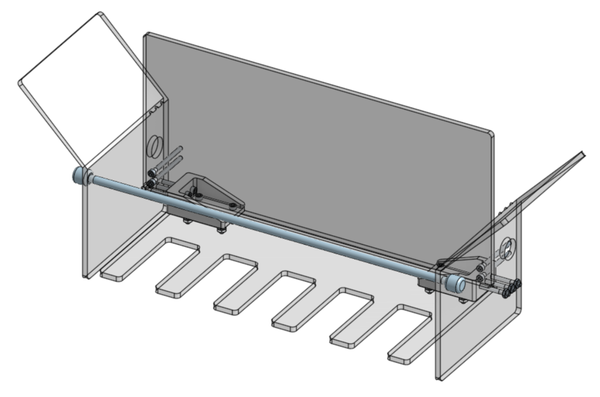
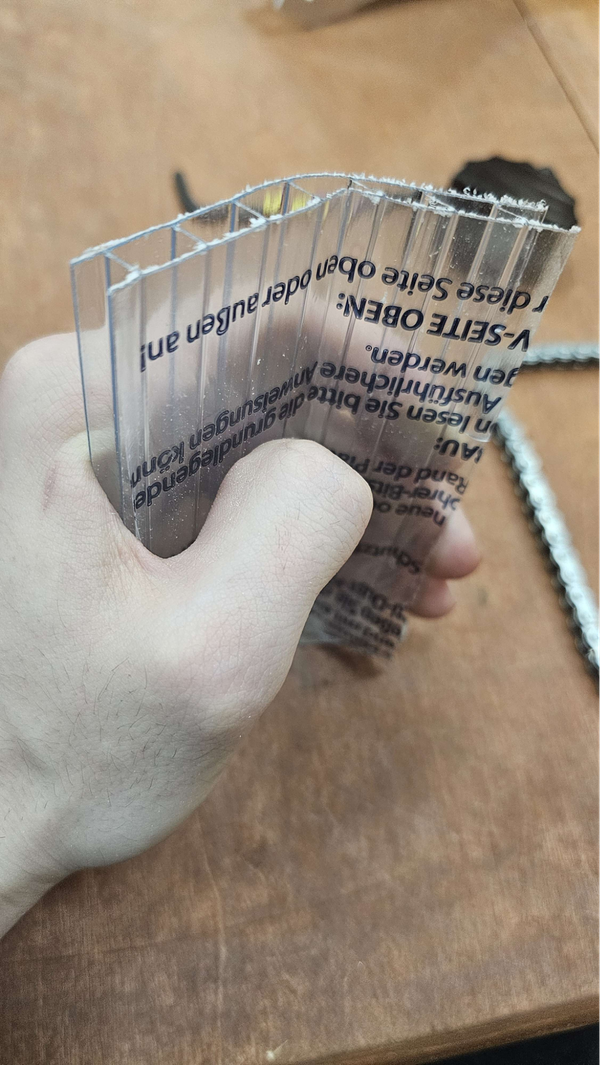
The Coral Basket is a relatively simple construction of four pieces of corrugated plastic. The direction of the ribs inside of the material matters greatly. Please pay attention to the direction of the ribs when laying out cut lines and bending parts.
The Coral Basket utilizes the Algae Intake roller when fully stowed to score the Coral into the L1 Trough. There is a piece of surgical tubing across the front of the Basket that acts as a ‘seat belt’ for the Coral to keep it in place when the Intake roller is not present.
Required Tools
- ⅜” Wrench/Socket
- 5/32” Allen Key
- #7 Drill bit
- ⅜” Drill bit
- Band Saw or Jigsaw
- Hand drill
- Sharp Utility Blade
Coral Basket Materials
Here is a rough approximation of what you will need:
- Qty(8) x 0.75” 10-32 Socket Head Bolts
- Qty(6) x 2.0” 10-32 Socket Head Bolts
- Qty(4) x 2.5” 10-32 Socket Head Bolts
- Qty(18) x 10-32 Nylock Nut
You will need to make:
- Qty(1) x 05_Backstop
- Qty(2) x 05_Side-Plate
- Qty(1) x 05_Bottom-Plate
- Qty(2) x 05-3DP_Bottom-Bracket
- Qty(1) x ~20” Piece of Surgical Tubing
Coral Basket Machining
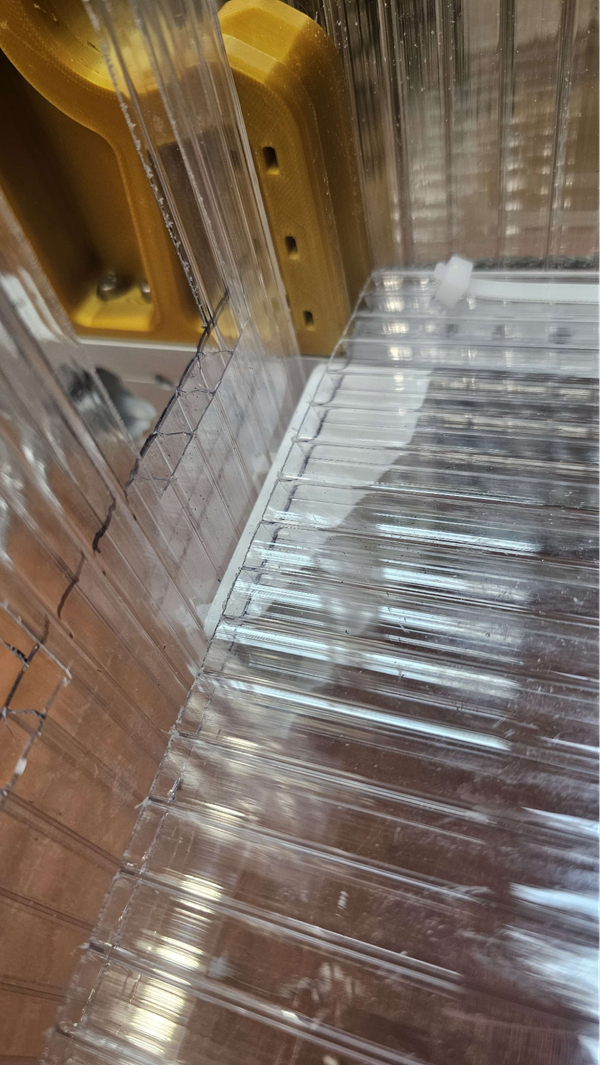
When cutting the corrugated plastic be very careful which way you decide to cut it. The plastic has ribs that govern the way it bends, we want to use these ribs to our advantage. In the image below we want to bend the bottom towards the top, to do this we want the ribs to go side to side or horizontally. All the drawings will call out which way we want the ribs facing.

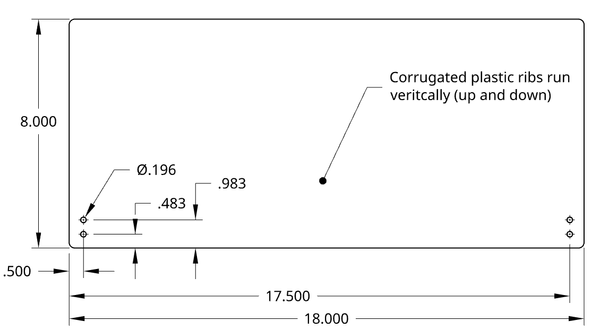
05_Coral_Basket_Backstop
There are a few marked holes, these can be drilled out ahead of time but we would prefer if you match drill them later on. Make sure that the ribs go from side to side when cutting this. Cutting this can be done with many common cutting tools like a jigsaw, bandsaw, handsaw or other cutting tool.
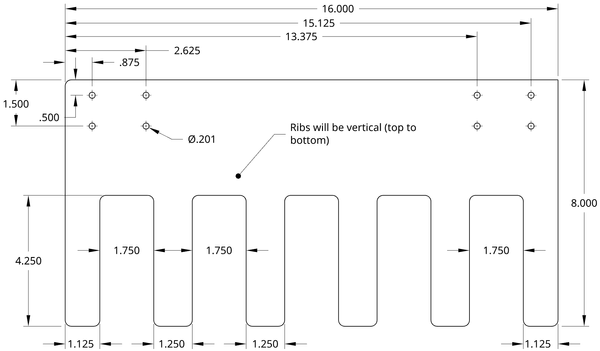
05_Coral_Basket_Bottom-Plate
Start by cutting the part to size, then begin working on slots. The slots can vertically be cut with your tools of choice and the side to side cuts can be done with a utility knife. Once all the slots have been cut out you can line up your 05_3DP_Bottom_Brackets with the corners and use them to match drill the holes with a #7 drill bit.
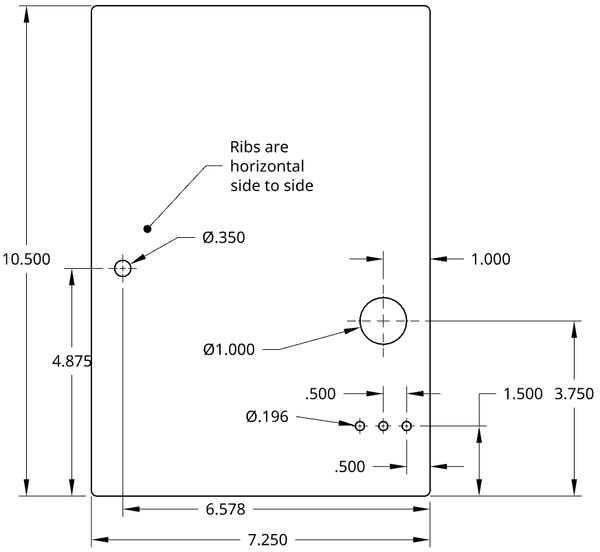
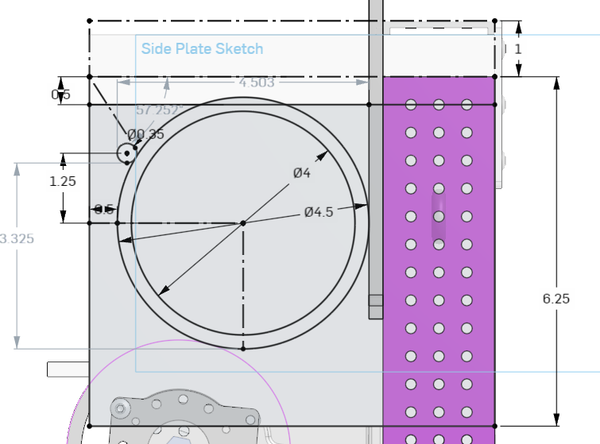
05_Coral_Basket_Sides
We recommend that the three smaller holes be match drilled later on. The larger hole can be made with a step drill bit. The 0.35” hole should wait until later on to be drilled out.
Start by attaching the 05_Coral_Basket_Backstop to the superstructure. The backstop will rest on top of the 03_3DP_Hardstops. It will go on the opposite side of the cage hardstops. Drill holes through both the backstop and the superstructure to add either bolts or zip ties. Secure it in place.
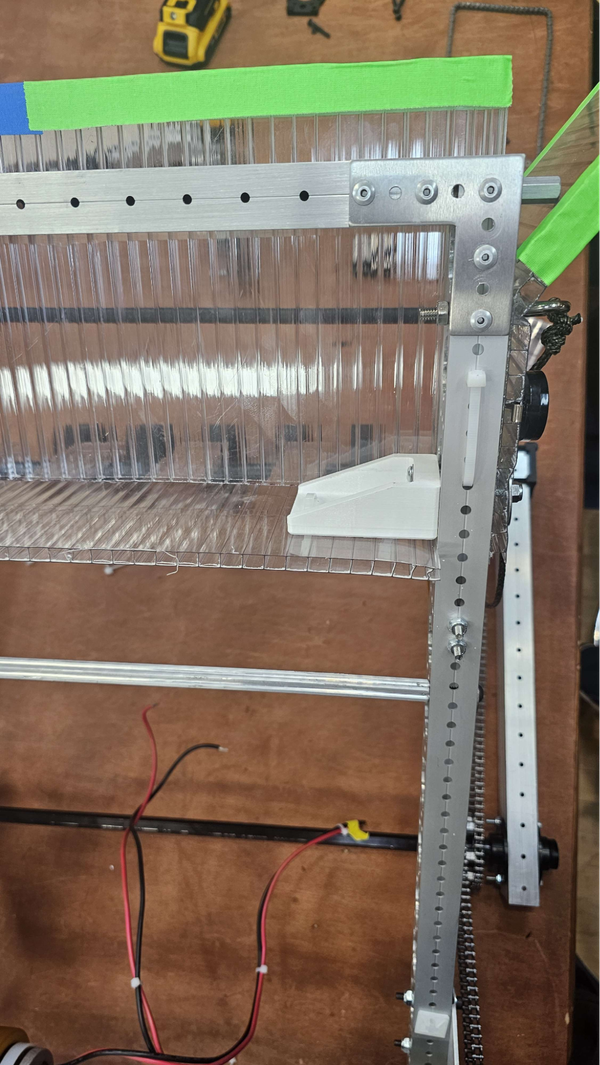
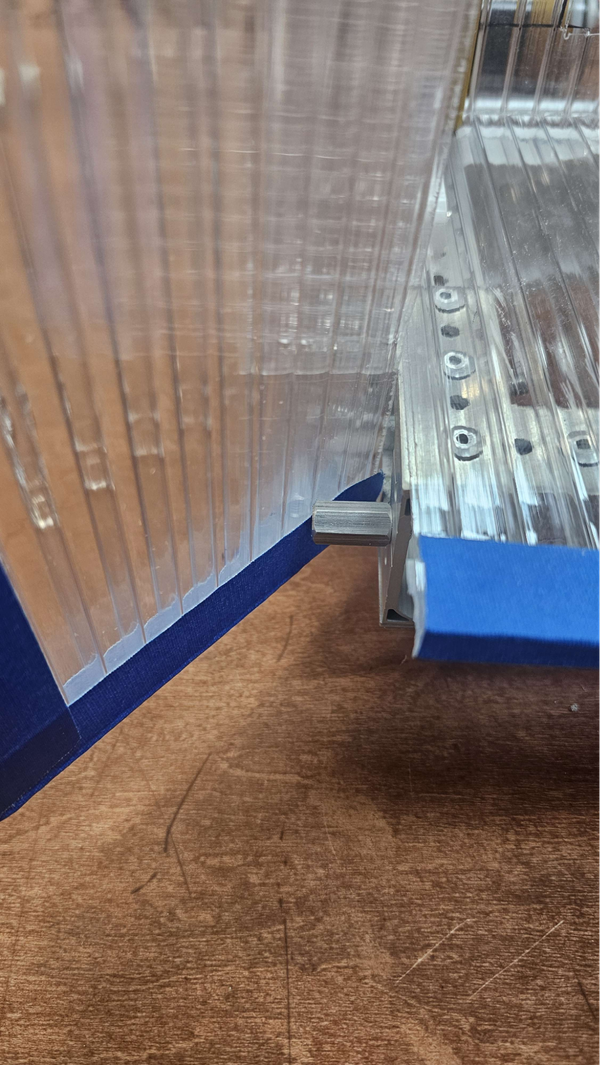
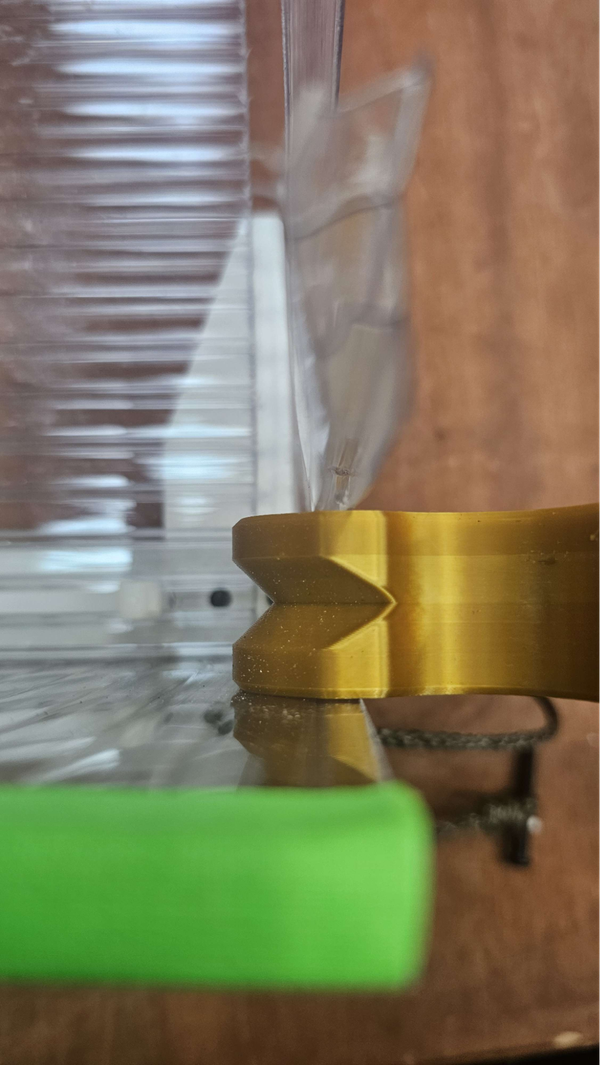
Next we will need to prepare the 05_Coral_Basket_Side_Plates. If you did not pre-drill the side holes on the plates, you will need to match drill them. Our side plates were ~0.75” below the top of the 03_3DP_Hardstops. Clamp them in place then drill out the holes, adding bolts as you drill out a hole. Once the hole has been drilled out, you can bend them at the correct location, such that they will rest on the standoff. With a little bit of repeated back and forth force you should be able to bend the plastic. These will be attacheched in a later step.
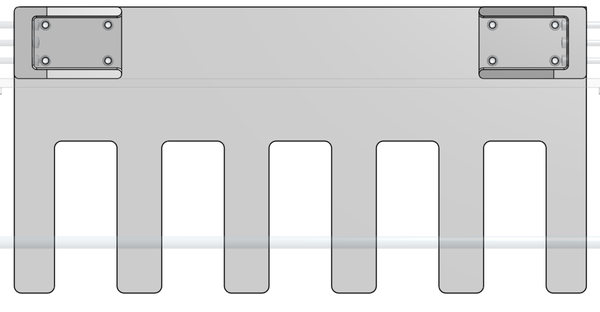
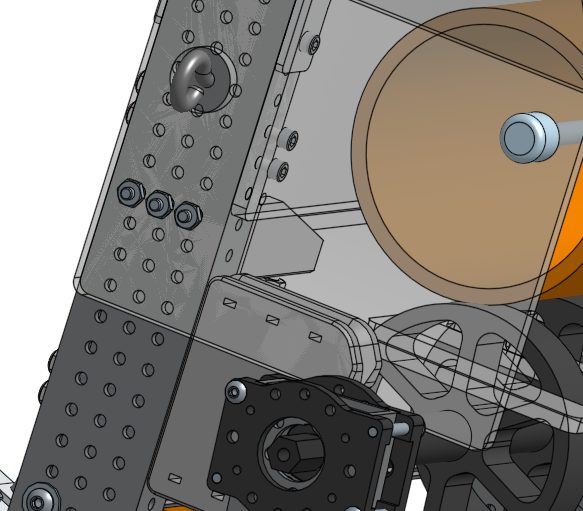
Now we can begin attaching the 3D printed 05_3DP_Bottom_Brackets to the superstructure. They will be mounted 25” up the superstructure, with their body roughly centered with the top of the 3D printed. Use three 2” 10-32 bolts with Nylock nuts to secure it, with the bolts on the inside of the superstructure. When attaching them to the superstructure you will need to also add the 05_Coral_Basket_Side_Plates to the outside of it.
From here you will need to attach the 05_Coral_Basket_Bottom-Plate to the bottom of the 05_3DP_Bottom_Brackets with four 10-32 0.75” bolts and Nylock nuts per side.


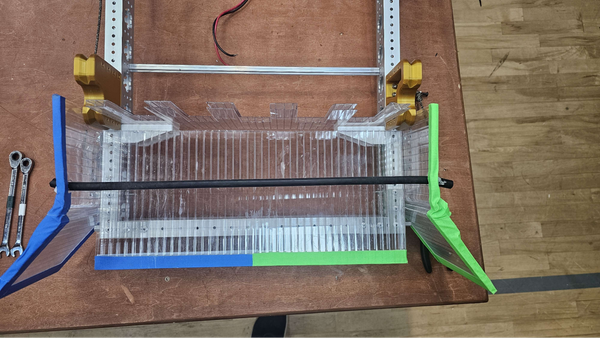
The last step is the addition of the surgical tubing. To find the location for the surgical tubing hole take a PVC pipe and place it into the coral basket and back it up against the backboard. Then taking a sharpie, mark about halfway up from the center on the outer circle of the PVC pipe. Mark on both sides then drill out the hole. See the location of the 0.35” inch hole for reference below. We found that a ~7/16” drill bit will give a large enough hole to get surgical tubing through but it might be possible with a ⅜” bit and pliers.
Once the holes on both sides have been drilled run the ~20” length of tubing through the sides and use zip ties to prevent the tubing from going through the sides. The surgical tubing should be slack enough such that the PVC is able to displace it when coming in from above and when being expelled from the machine.
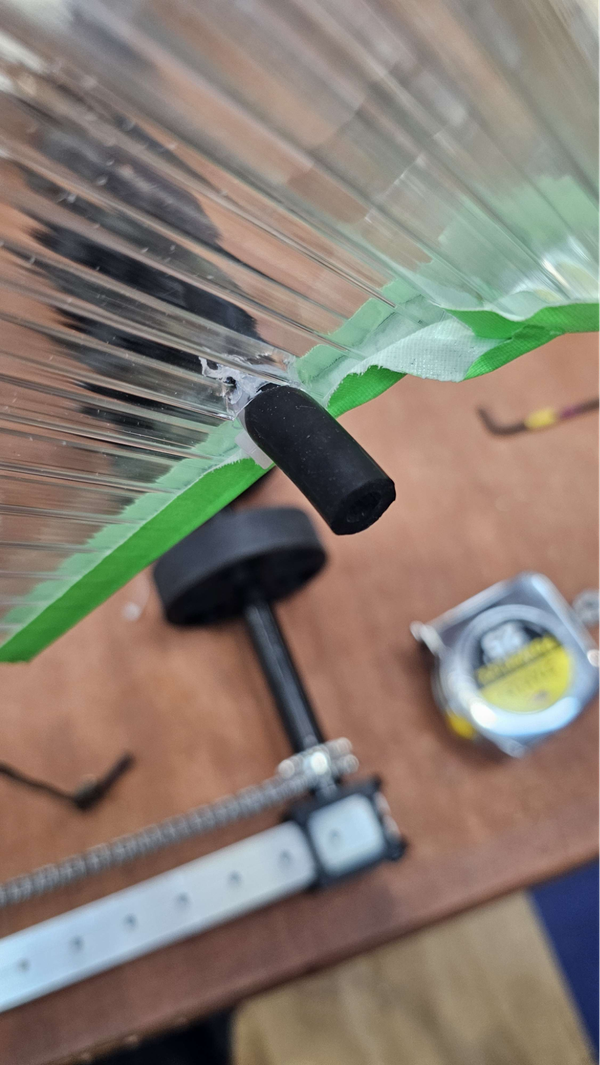
The corrugated plastic can be sharp, so make sure to add some tape to help prevent getting cut on it.