Bumpers
Your team will need to make two sets of bumpers, one for when you are competing on the red alliance and one for the blue alliance. We made a single-piece unibumper with wood that is 5” tall and 3/4” thick, which satisfies R402. Bumper wood can be made shorter but must not be shorter than 4.5”.
Here is the bumper BOM for a set of two bumpers:
3/4” Thick Plywood:
-
Qty(4) @ 5 - ½ in. x 33 - ½ in (5.5” x 33.5”)
-
Qty(4) @ 5 - ½ in x 28 - ½ in (5.5” x 28.5”)
Home Depot Items:
-
Qty(8) 1-7/16 in. x 1-7/16 in. x 2-3/4 in. G185 18-Gauge Framing Angle (1-Pack)
-
Qty(4) 3 in. Galvanized Flat Corner Brace (4-Pack)
-
Flex Seal
Other Items:
-
Qty(8) Nylock nuts for 10-32 hardware
-
Qty(8) nuts for 10-32 hardware (may not be needed)
-
Gaffer’s Tape (or similar)
-
Qty(8) Bumper Noodles
-
Red Bumper Fabric
-
Blue Bumper Fabric
-
AndyMark Bumper Hardware Kit
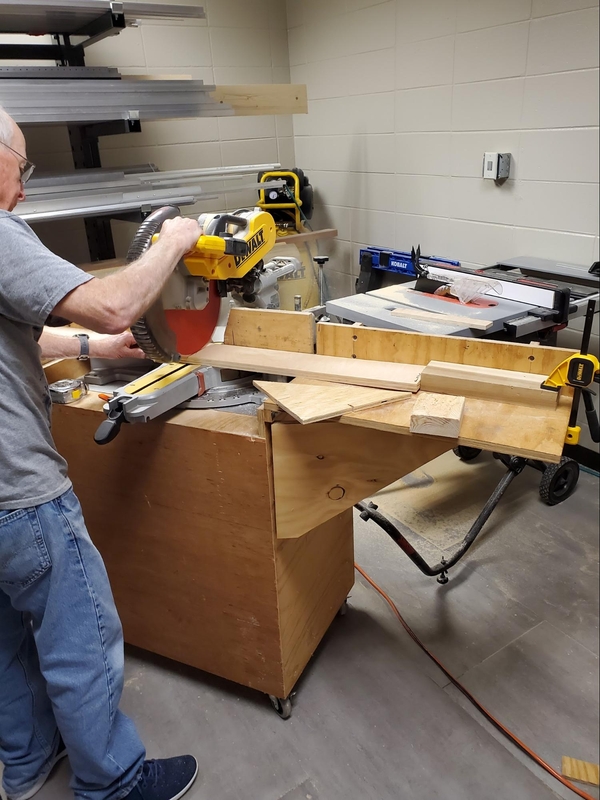
Starting with the sheet of plywood, cut 8 sections of 5.5” strips. Then using the 5.5” strips create four 33.5” planks and four 28.5” planks.
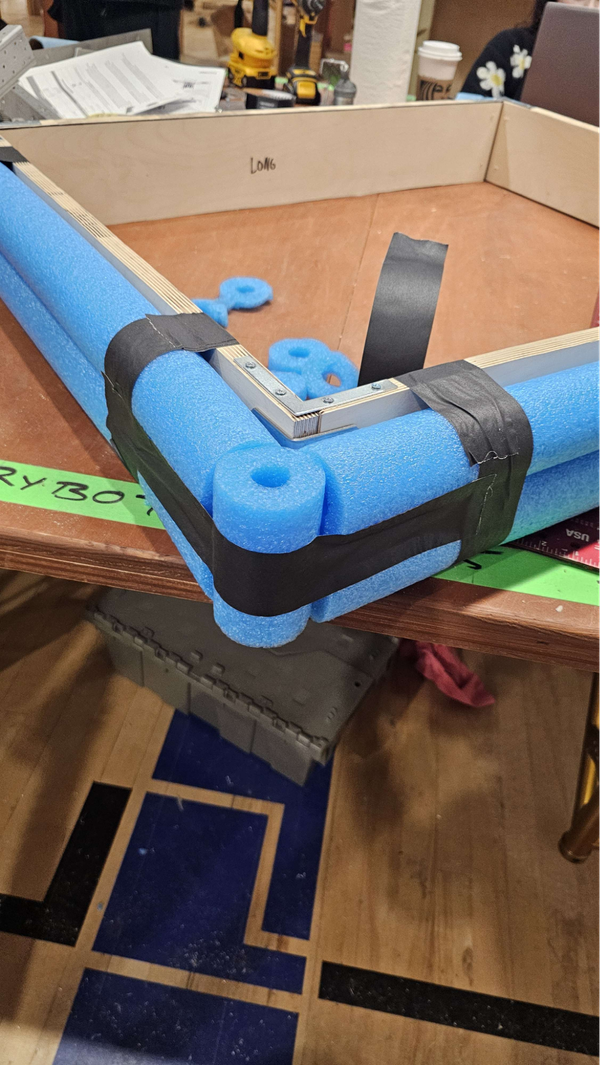
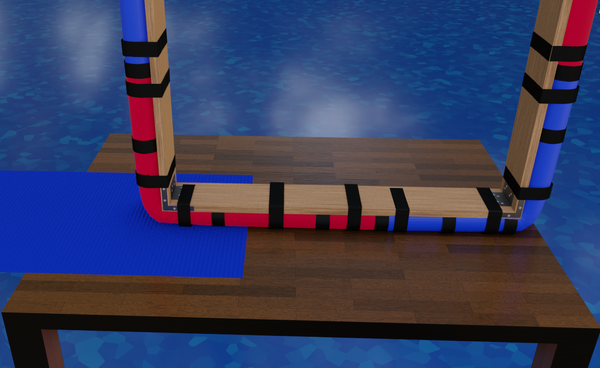
As of 2025 there have been some major updates to how bumpers can be constructed. Some of the images may show illegal pool noodles.
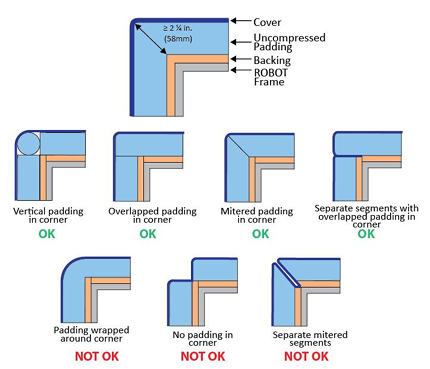
Previously we wrapped the noodle around the corner as shown in the bottom left image. We have since moved to the vertical padding method but some images may still show the illegal wrapping technique.
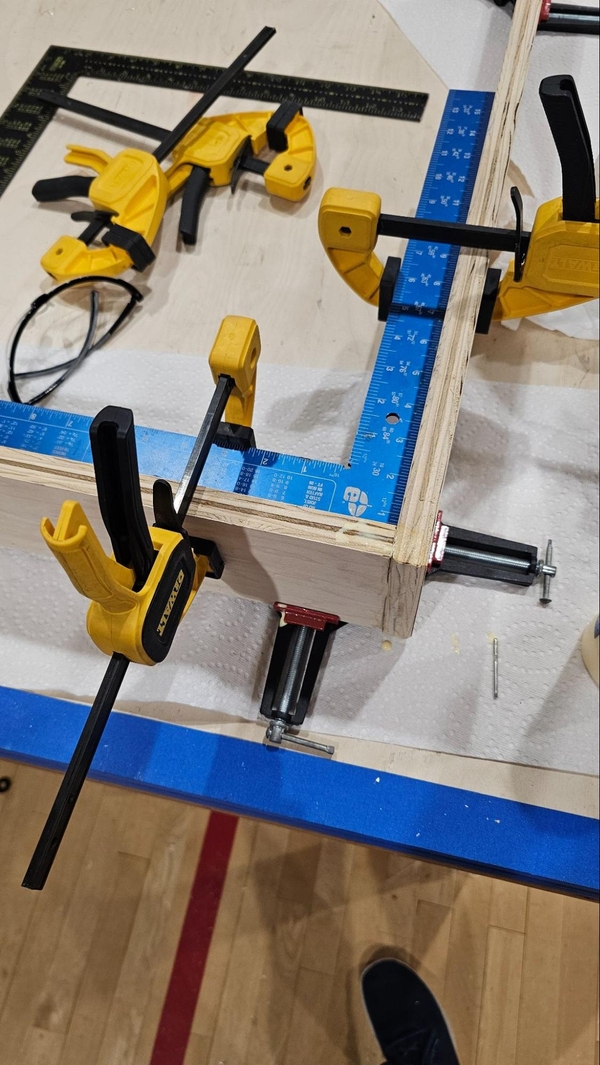
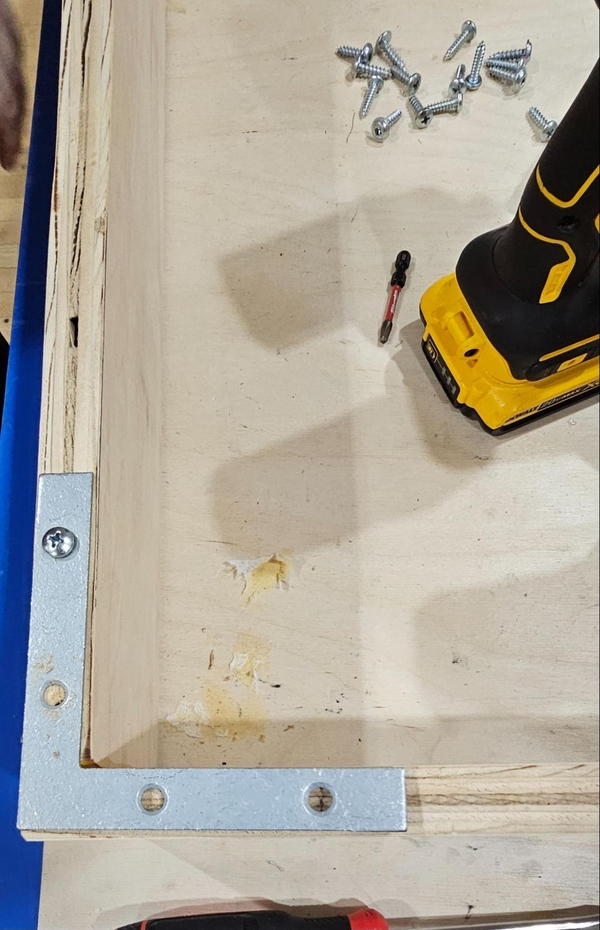
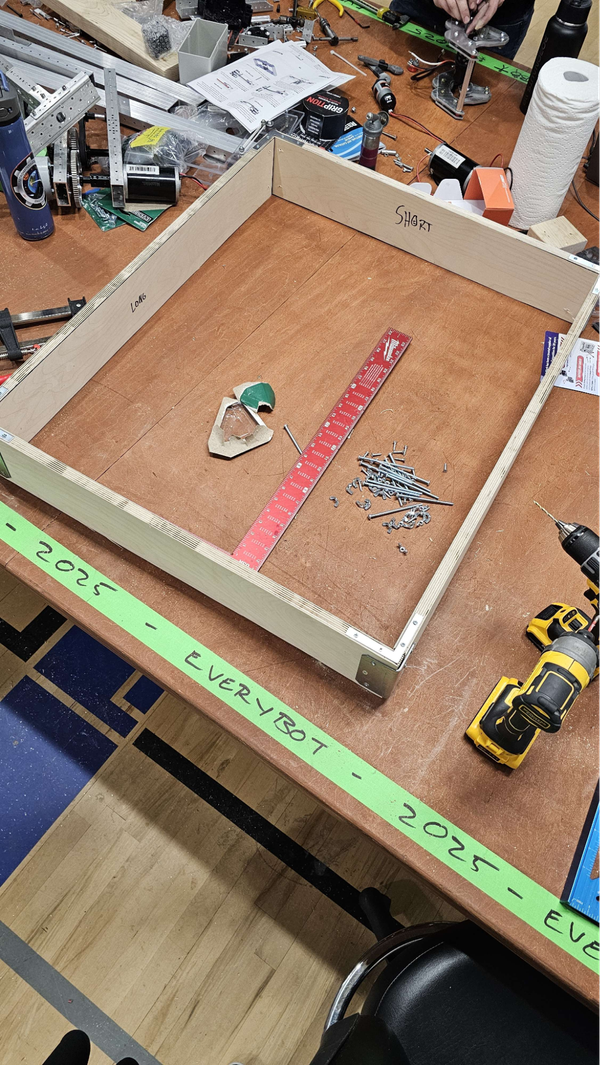
Start construction by butting up a longer plank against the shorter plank of wood. Use a 90 degree angle or speed square to make sure that the wood is a 90 degree angle. Clamp the wood into place once square and install a corner brace. Add wood until you have made a rectangle, making sure to butt the longer planks against the shorter ones (the ends of the 28.5” plank should be visible while the longer ones should not). Flip the frame over and add another corner brace at each corner. Finish by attaching a framing angle on the outside of each of the four corners with the wood screws from the bumper mounting hardware that come in the chassis box.

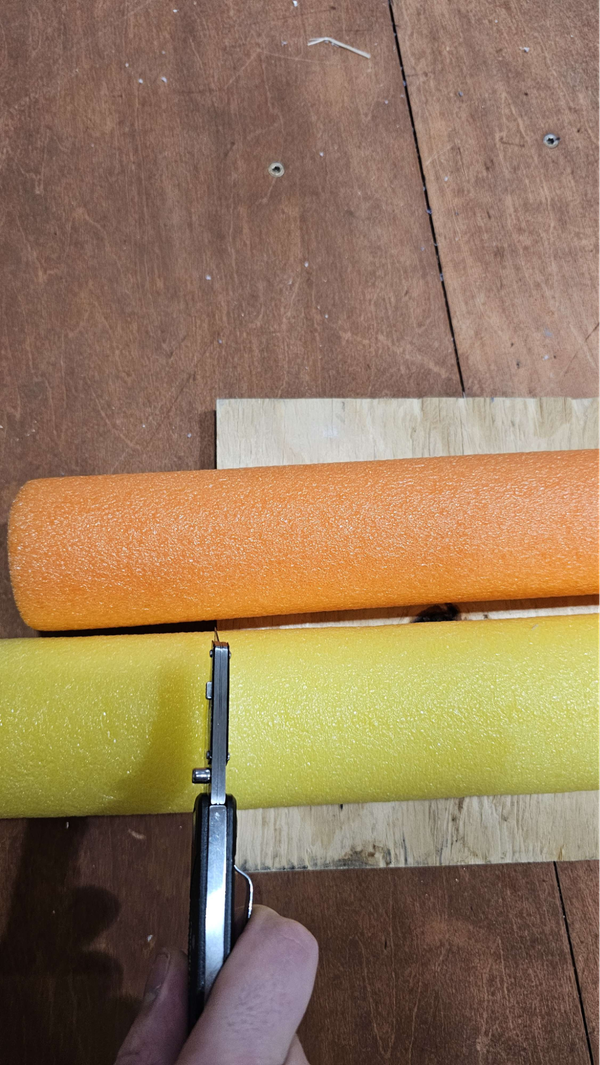
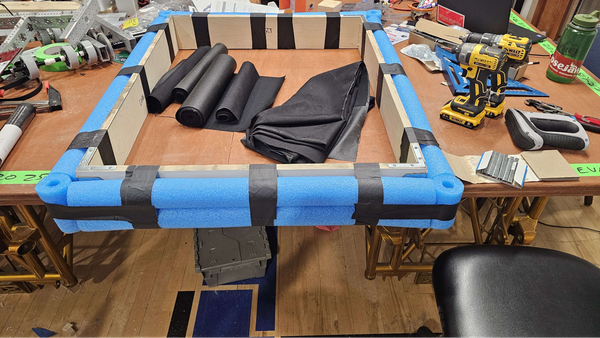
Next take two pool noodles and line them up with one side of the frame. Cut them such that the ends of the pool noodle line up with the ends of the bumper. Then using 2-3 loops of gaffer tape attach the noodles to the bumper frame.
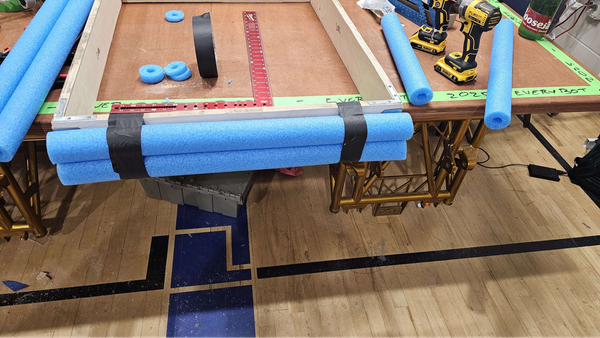
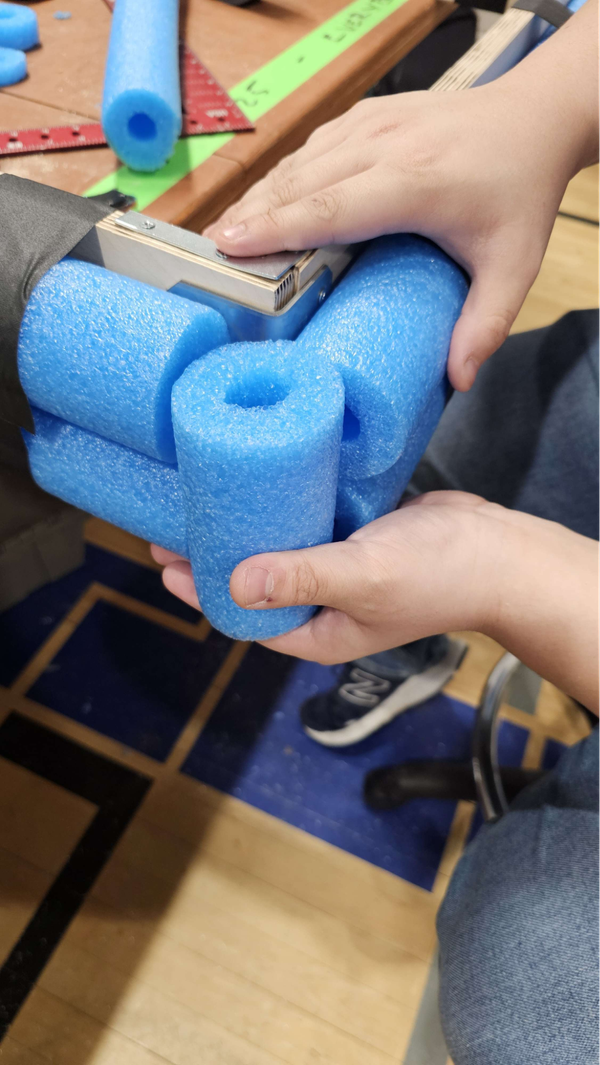
Repeat this on all sides of the frame. Now we need to protect our corners, we will be using vertical bumpers noodles in the corner for this. Cut a noodle roughly from the bottom of the lower noodle to the top of the upper noodle. You may want to use a bit more tape than we did but make sure not to compress the noodles.
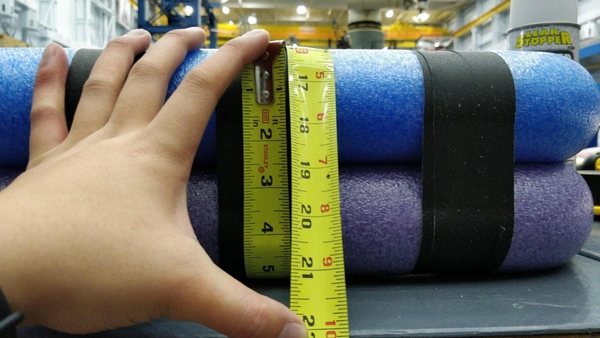
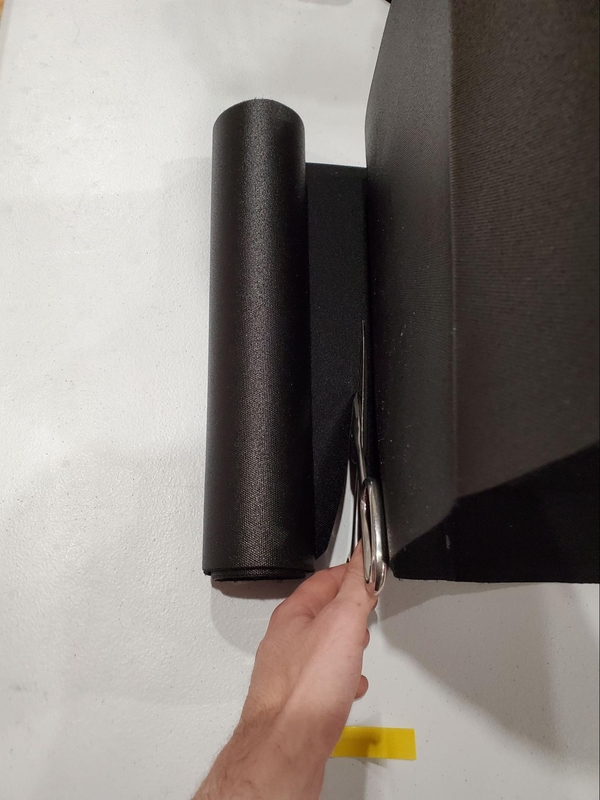
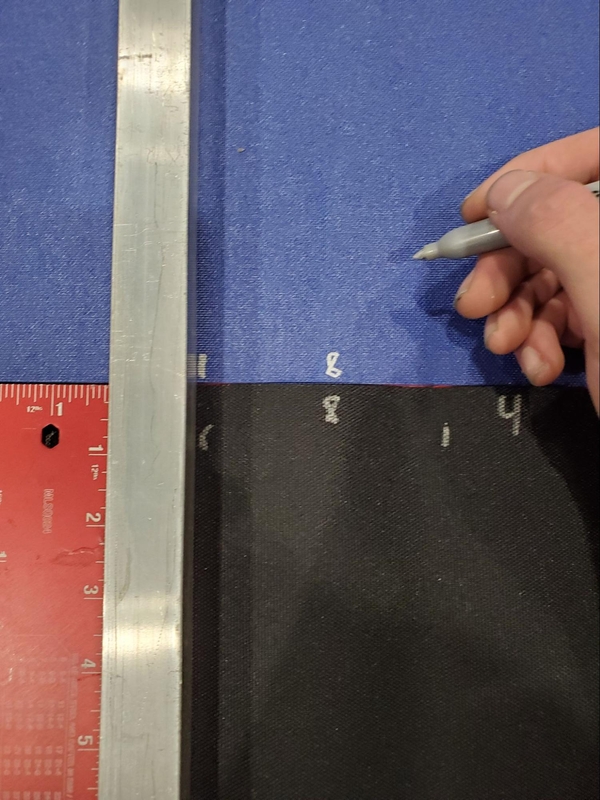
Measure out the width of the bumper fabric. To do this, we wrapped a tape measure around the pool noodles and bumper frame. In our case, the fabric needed to be just over 16”.
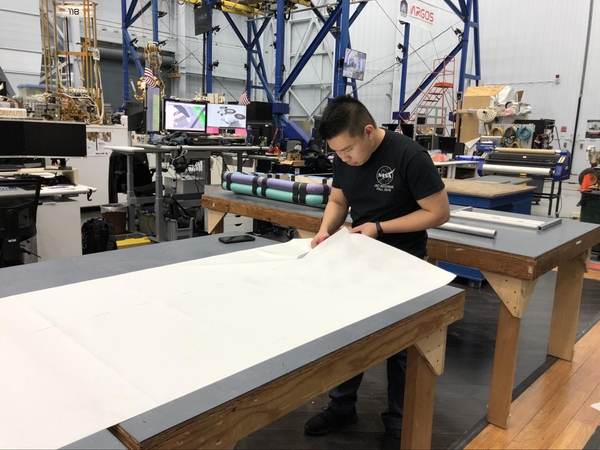
To cut the fabric, we laid the entire length on a group of tables and used scissors to cut along the marked line. Make sure to cut both the red and blue fabric to the same width.
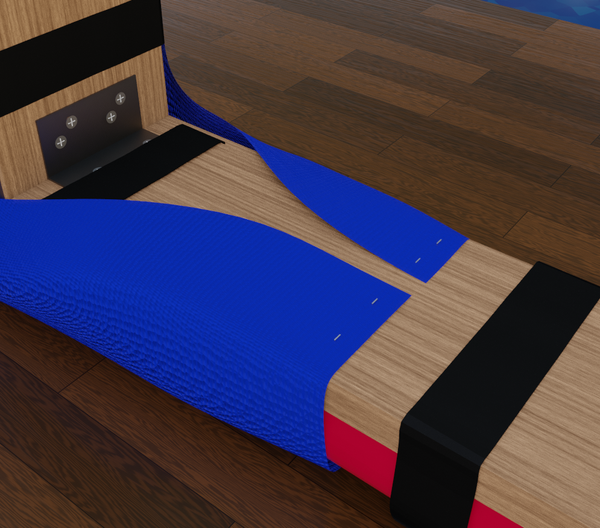
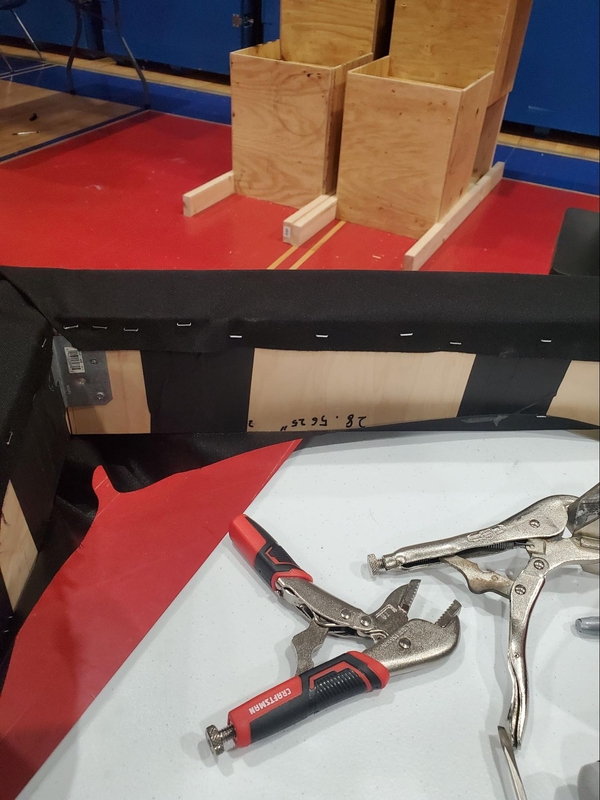
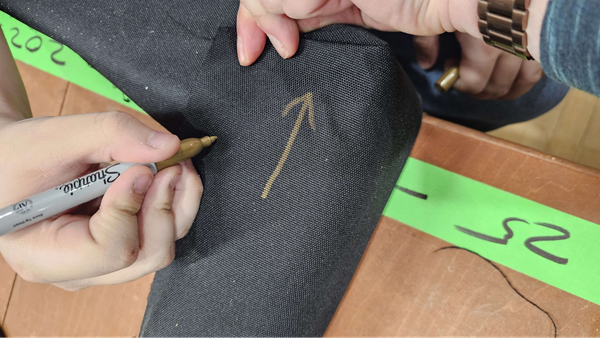
Next lay the fabric underneath a longer section of the bumper wood as shown in the picture below. Selection of this position is important for the coming steps, to find the ideal location use your stencils to layout the location of your numbers. The fabric should start about 2” from the end of the last stencil. Make sure to center the fabric widthwise such that there are equal lengths of fabric on both sides of the bumper.

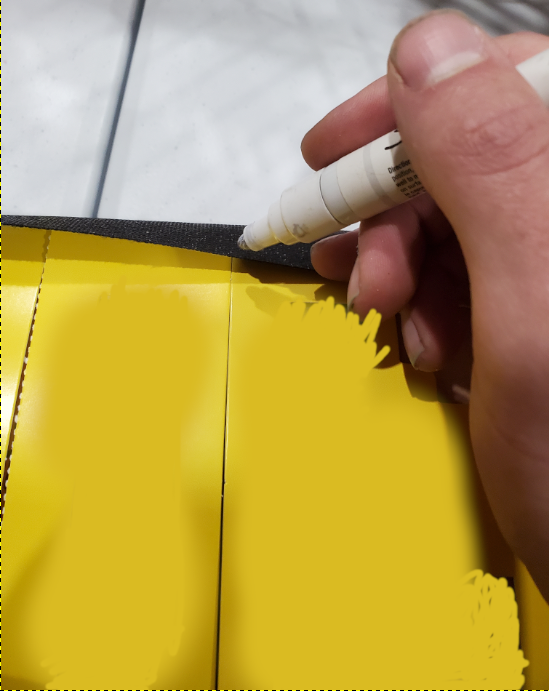
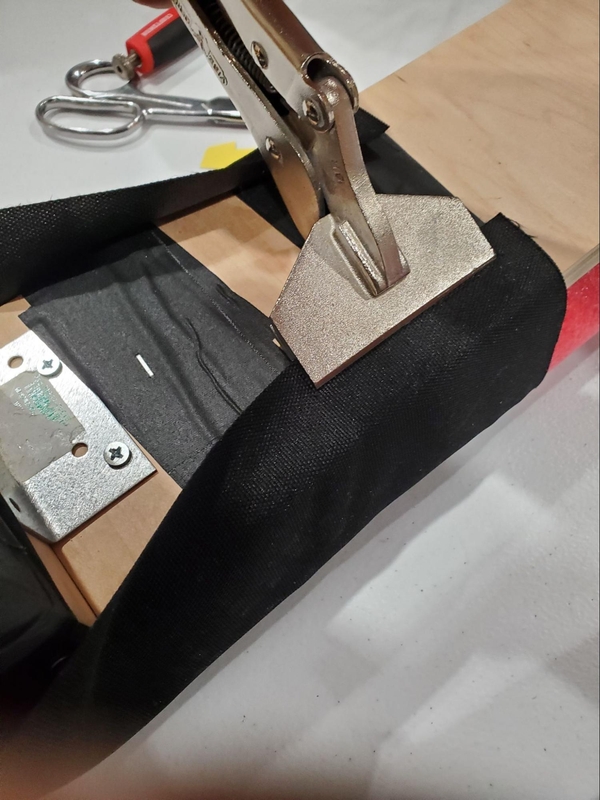
Once the desired location has been found the fabric can be wrapped around the bumper and stapled in place with two staples per side. It may be best to have one person pull the fabric towards the center, keeping a decent amount of tension on both sides while another person staples the bumpers in place. Alternatively one side could be fixed in place and the other side could be tensioned afterward. Overlap between the two sides is fine. Finally once the staples are in place on both sides mark the wood with a Sharpie where the staples went to assist with reinstallation of the fabric.
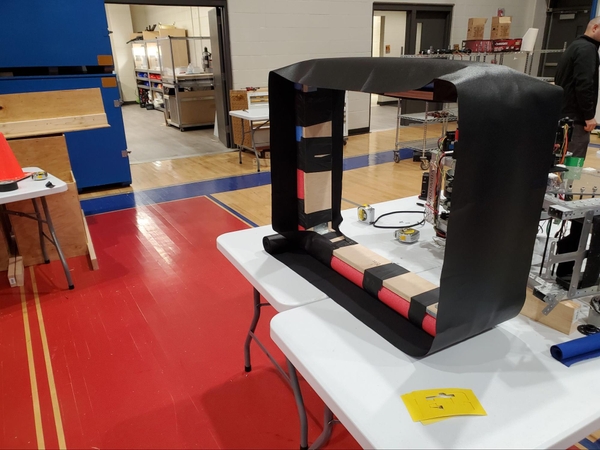
Next wrap the fabric around the entire wooden noodle assembly. There are two goals when doing this: make sure the fabric is tightly wrapped around each corner and keep the bumper frame centered within the fabric. The excess material can be cut off as shown below.
After the bumpers are secured, find the midsection of each bumper side, lay out the number stencils, and mark the stencil’s locations on the outside of the bumpers. Write the number in the center of the section as well so you know where each number belongs. The corners can also be marked if desired.
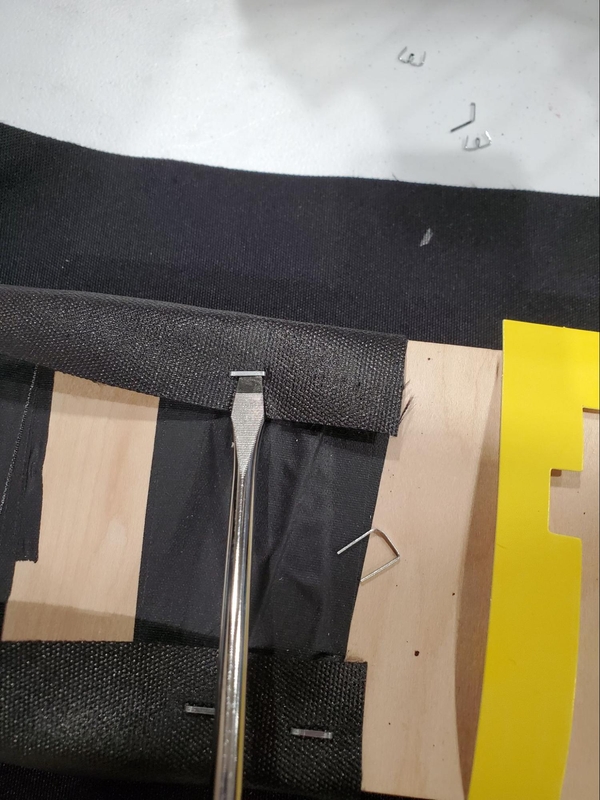
Once the bumpers have been appropriately marked, use a flathead screwdriver to remove the staples. Then take the opposite alliance color fabric and lay it out on the ground next to the marked bumper. Align the marked bumper end to end with the opposite colored bumper and then begin to transfer the markings onto that bumper. Using a long piece of box tube or a long measuring device is a good way to make sure that the markings line up well. Finally cut the opposite colored fabric to the same size as the one that was stapled.
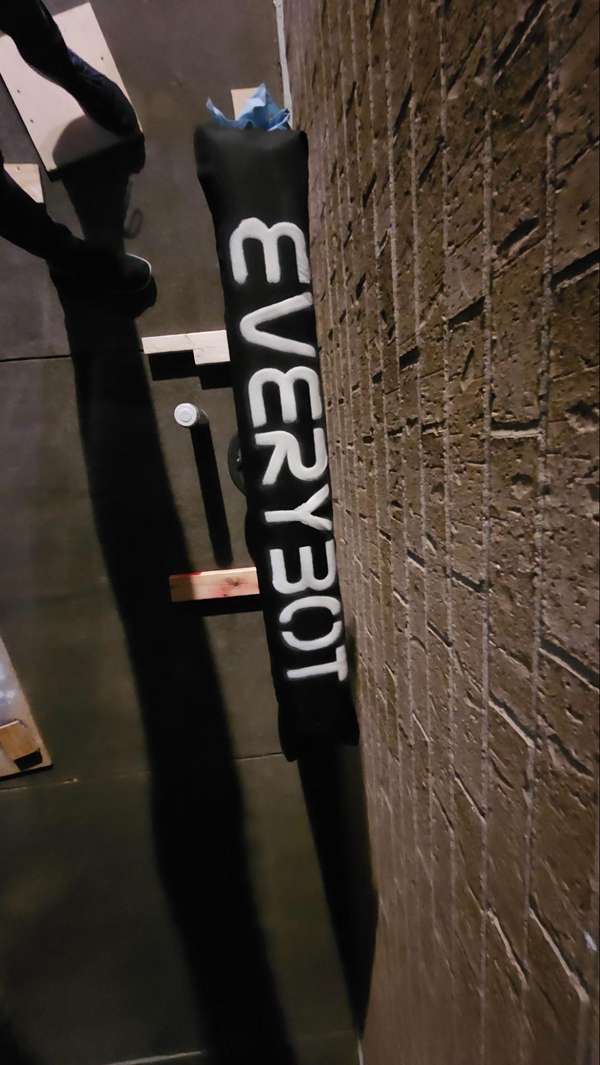
Once the bumpers have been properly marked it is time to add your team’s numbers. We used a wooden template and white flex seal spray to add the team “number” to the bumpers. We elevated the wooden template off the fabric by 1/2” to reduce the amount of paint build up between the fabric and wood. However teams can also use Stick on numbers, Vinyl adhesive, or hand painting. We made sure the template was centered top to bottom and left to right before starting the spray. If you used our BOM to buy bumper materials you will have Flex Seal and the stencils. For the best look attempt to evenly elevate the stencils 1/2” above the fabric and spray from a higher distance, making sure to not to get Flex Seal on the rest of the fabric. Taping the stencils to the bumper material may also work. Make sure to let the Flex Seal dry before continuing.
Once the bumpers have been painted we can move to reattach them. Repeat the steps that were taken to attach them the first time making sure to staple them in the correct location. Make sure that all numbers are centered on the bumpers.


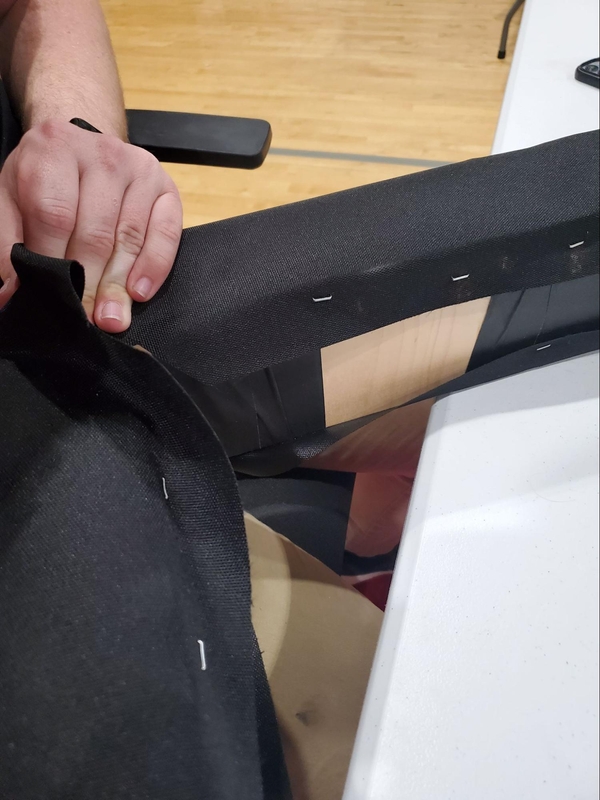
First we will begin adding staples to the top of the bumper. Staple in the center of each side first, making sure the fabric is centered. It may be best to add a single staple on the bottom of each midpoint before moving on. When adding staples on the bottom make sure the fabric is pulled as tight as possible. Add staples until you reach the approximate spacing from the corner shown below. Staple all sides before moving onto the corners.
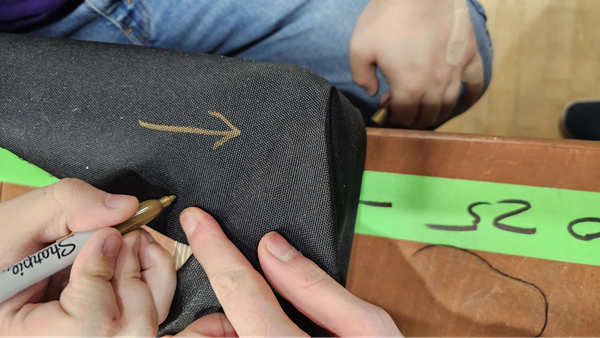
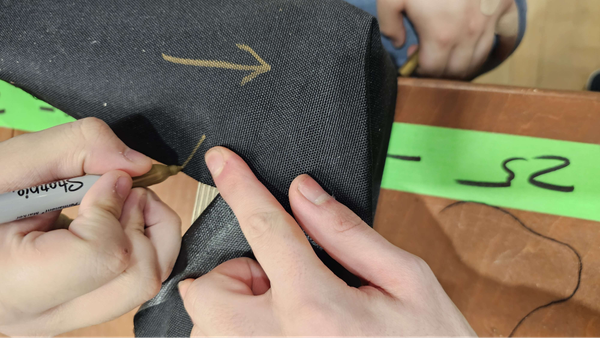
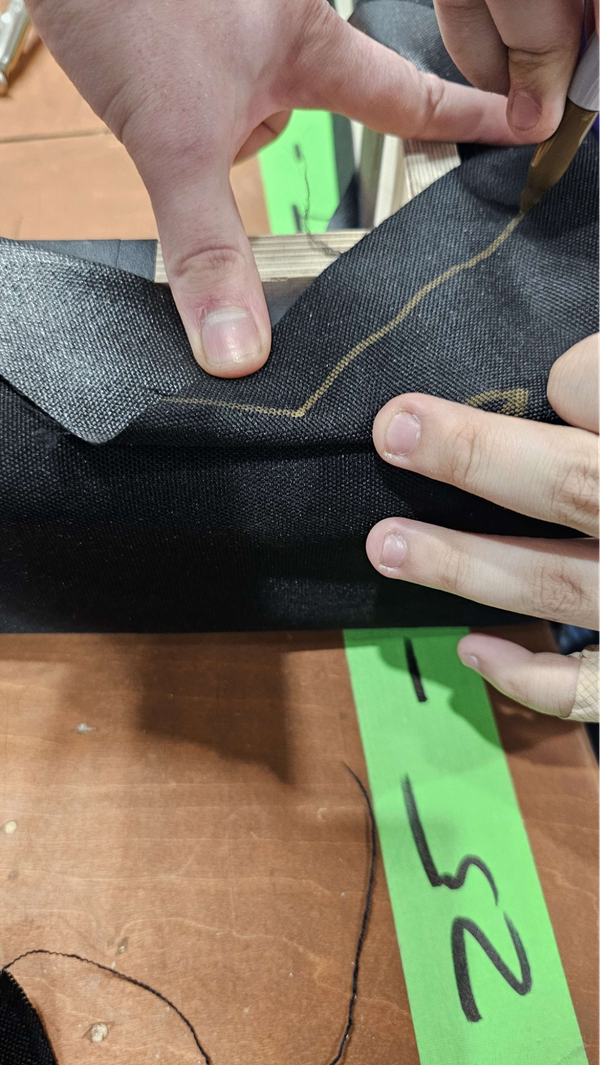
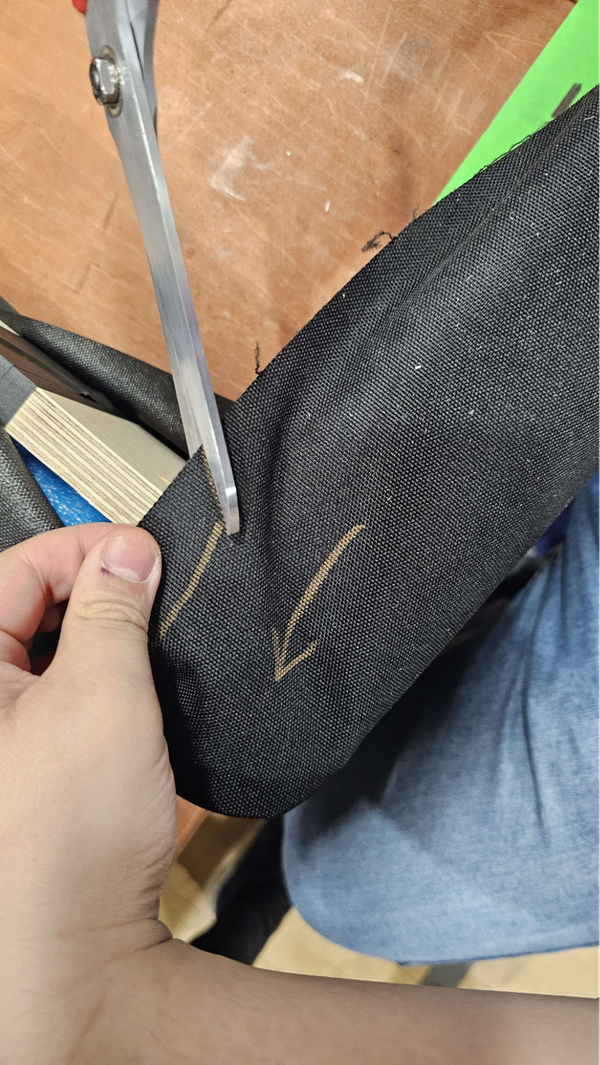
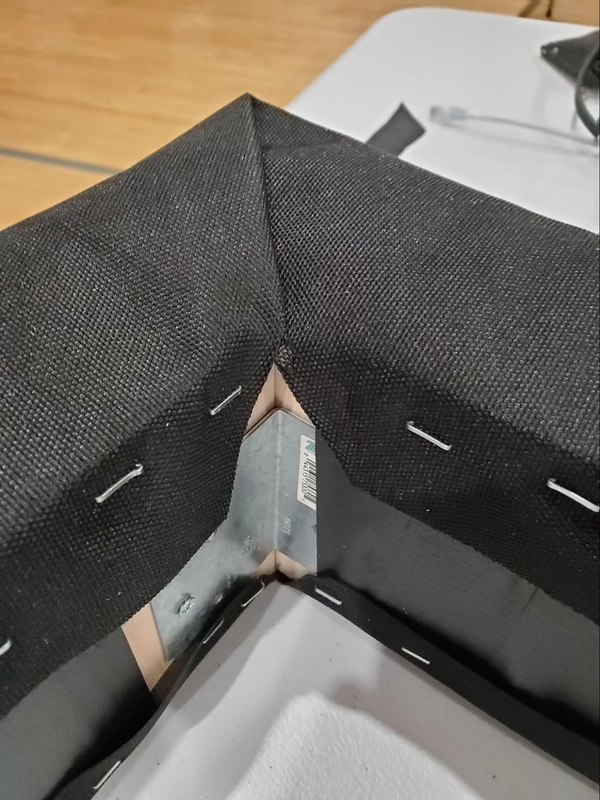
Here is a method we used for having nicer looking corners. Use one hand to pull the corner fabric parallel to one strip of wood while holding scissors in the other. Use the scissors to find the corner of the wood and then mark a 45 degree angle. Fold the material towards the other side and mark the same 45 degree angle. Finally make a straight line connecting the 45 degree lines. It may be best to leave an eighth of an inch from the corner to the start of your line. Cut along the lines created.
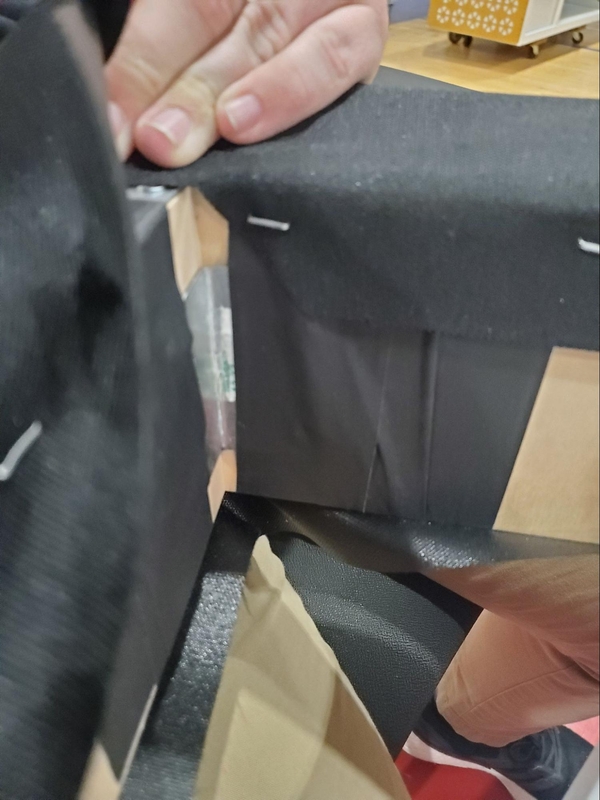
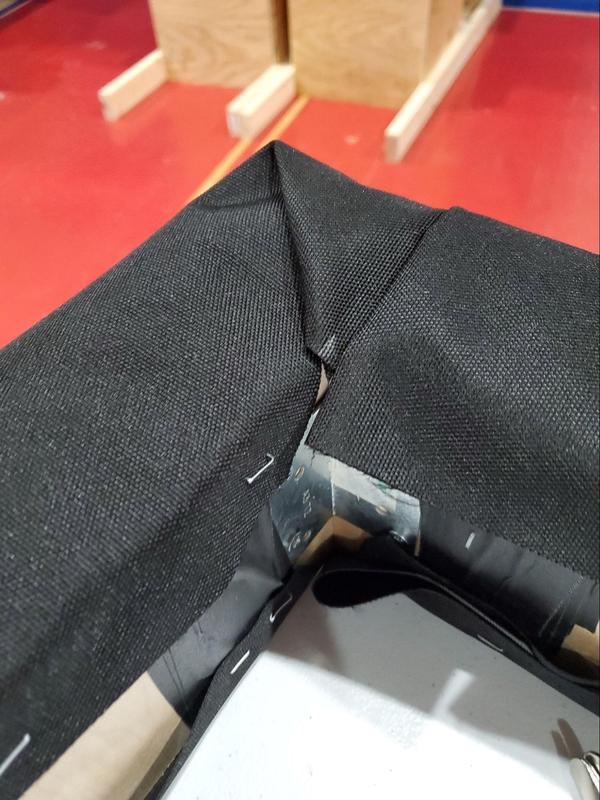
Once a corner is cut we will start adding staples. Pull the fabric tight to one side and add staples. After one side has staples fold the fabric over itself and attempt to get the corner to like it does in the bottom photo. Add staples to complete. Do this for all corners on the top.

After the top has been completed, flip the bumpers over and begin stapling on the new top starting from the center again. Make sure the fabric is pulled as tight as possible for the best looking bumpers. Using wide vice grips can be very useful for this task. You will have noticed that one of the sides has a good chunk of excess fabric, fold it over itself, leaving some space for the corner. Staple down the folded over excess fabric.
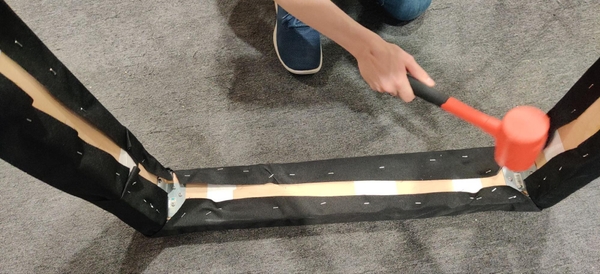
Once all sides have staples in them and everything looks correct, use a mallet on the staples to push them further into the wood so they do not stick out.
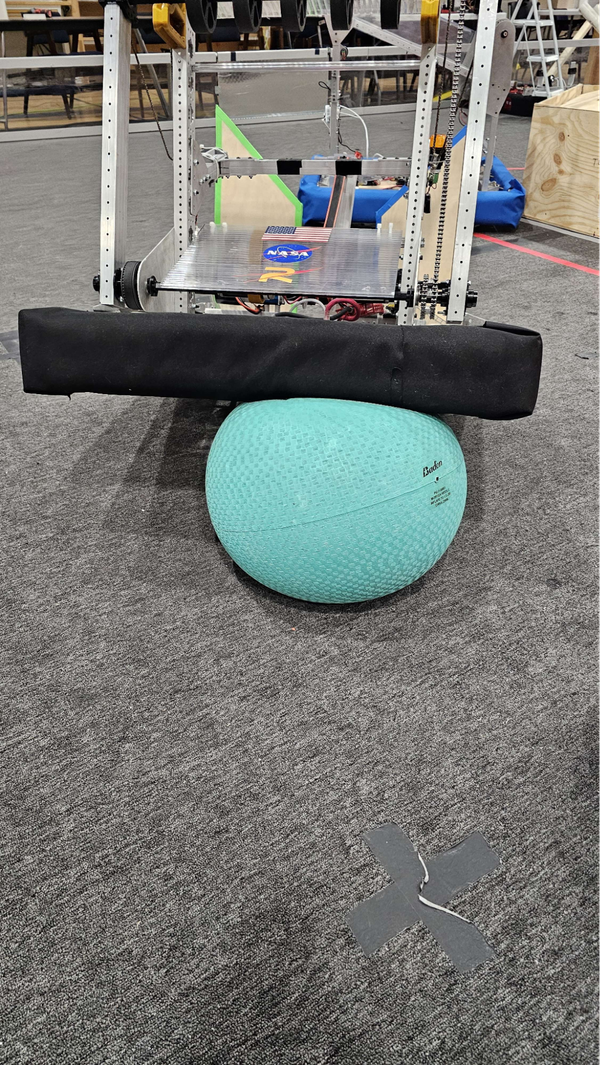
This year we want to keep the bumpers as low as possible as Algae likes to get stuck under robots. Bumpers should not be dragging on the floor but should be low enough to limit the ease that Algae will have sneaking under your chassis. Running over Algae could lead to your robot being high centered on them which will require a team-mate to rescue you. We found that having the top of the bumpers as low as possible while still remaining in the bumper zone to be best. Please double check R405 to ensure that your bumpers are legal.
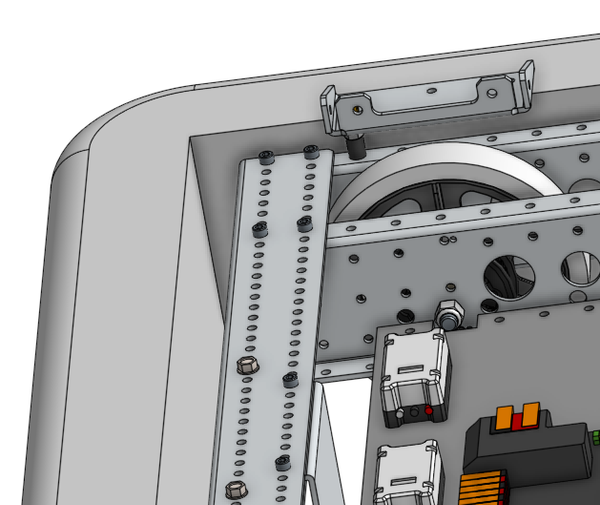
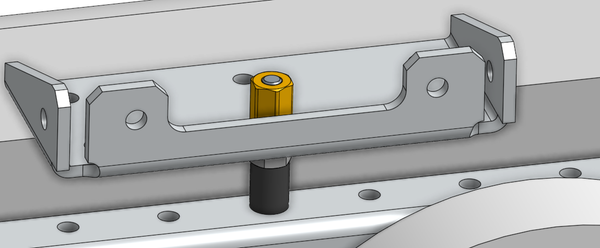
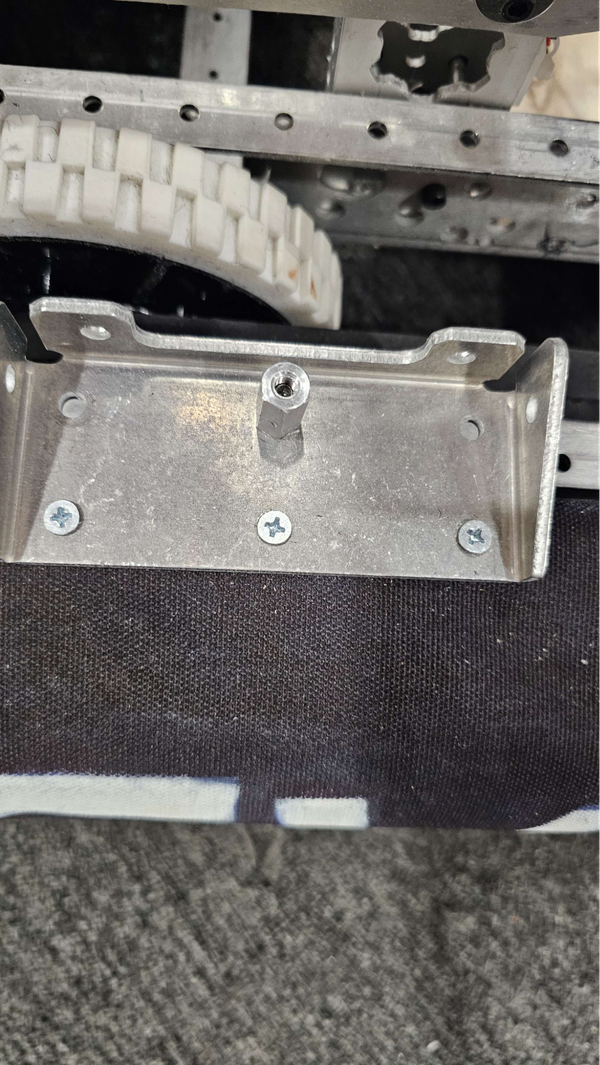
We only used the front/back brackets that come with the chassis, with two at the upper side corners and two more in the back side corners. Note that 8 total front/back brackets will be used, 4 for each alliance color of bumpers. The brackets are secured to 1.5” 10-32 bolts that stick vertically out of the chassis. Bolts on the front are on the 5th hole and bolts on the back are on the first side hole. The bumpers are set to the appropriate height by using Nylock or regular nuts as spacers. We use a ½” nylon spacer and a Nylock nut as a spacer to achieve our bumper height. These nuts should be left in place on the bolts when changing the bumpers. If you want to use wingnuts over standoffs rotate the bracket 180 degrees.
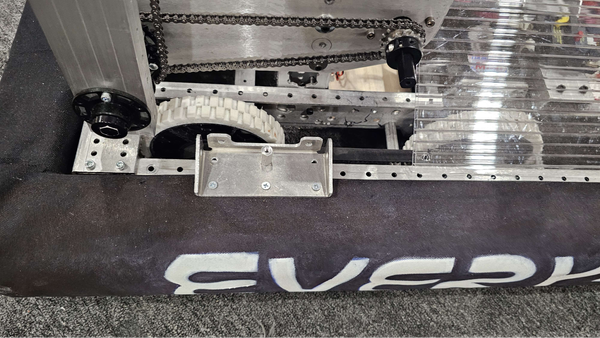
Wood screws are used to secure the bumper to the bracket. Put the bumper frame over the robot and put it in place around the chassis. Position the bumper bracket over the bolt and add another nut to hold it in place. In order to install wood screws, you will need to drill a pilot hole for your wood screws through the fabric, corner brace, and into the wood frame so that the wood screws will be able to bite directly into the wood. Ideally, you will be able to get three wood screws into each bracket.
½” standoffs or the provided wingnuts should be used to ensure the bumper cannot come off during the match. Once one set of bumpers is undone, remove the standoffs holding the brackets down, lift the bumper set up, put the other color of bumpers in its place, and position four more brackets in place and tighten down the nuts again to hold them in place. Drill out pilot holes and then wood screw these four brackets in place to the other bumper set.
Severely compromised bumpers can result in your robot being disabled during a match (G413).