Configuring Spark MAX Motor Controllers
To configure the Spark MAX motor controllers, please download the REV Hardware Client. This webpage has all the information needed to use the Spark MAX but we will go over the relevant information below.

Run the installer and click through the install process. RUn the program and check the “About” tab to see if there are any updates available.
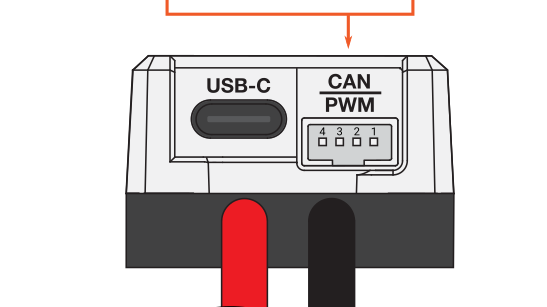
The Spark Max includes a USB C port which is the easiest way to interface with individual Spark Maxes. Spark Maxes can be connected to when unpowered or completely disconnected from the robot or battery when connected over USB. The USB port is located next to the PWM/CAN connection on the power input side of the controller.
With the Hardware Client open, plug in one of the Spark Maxes. It should appear over to the left side of the window.
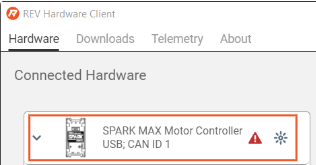
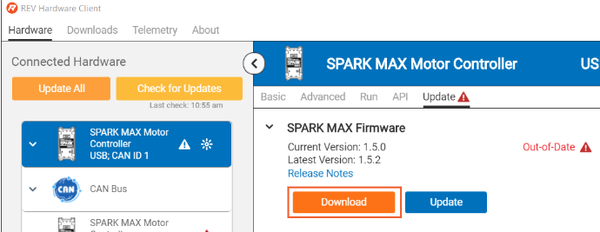
If you see a red triangle, the Spark Max firmware is out of date. Click into the controller and download and update the firmware in the “Update” tab.
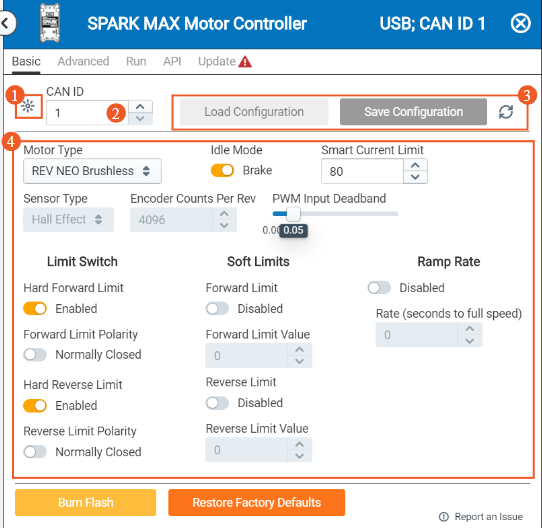
Click back to the “Basic” tab. The two most important settings here are the CAN ID and the Motor Type. The CAN ID is how each controller in the chain knows to respond to commands sent by the code and must be unique for each controller on the bus.
The CAN IDs expected by the provided Everybot starter code are as follows:
1 - Left front drive motor
2 - Left rear drive motor
3 - Right front drive motor
4 - Right rear drive motor
5 - Intake Roller Motor
6 - Algae Arm motor
7 - Climber motor
The motor type should be set to “REV NEO Brushless” if using a NEO motor or set to brushed if using any other type of motor (CIM, 775pro, etc). Leave the sensor type to none unless you have specifically added a sensor compatible with the Spark Max to your robot and plugged it into the current Spark Max (if the motor type is set to NEO, the sensor type should automatically change to read the NEO’s hall effect sensor). When you have set the CAN ID and motor type correctly, click “Burn Flash” at the bottom of the window. Do not worry about the “Save Configuration” button, this saves a copy of the current settings to the local computer, not to the motor controller itself.