Cutting Metals
Machinery
General Machine Safety Tips
-
Always use proper PPE (Personal Protective Equipment) when operating machines. PPE includes:
- Safety glasses for eye protection (should be worn during any shop procedure)
- Hearing protection in the form of ear plugs or safety ear muffs
- Hair ties if you have long hair
-
Have appropriate attire:
- Safety glasses worn whenever in the shop
- Durable close-toed shoes
- Long pants are preferred
- Long sleeves rolled up when operating tools
- Hoodie drawstrings tucked in or removed
- Jewelry that could get caught in a machine removed (watches, rings, bracelets)
- No gloves when operating machines
-
Adopt a Safety Mindset
- Ask if something feels safe, what could go wrong, can it be done safer?
- What do your surroundings look like, are others prepared for you to operate your machine
- Look for improper use of tools, trip hazards and unprotected sharp objects
These are only tips, this is not comprehensive or adequate safety training. The machine operation sections will also provide general safety tips but will not be comprehensive for safe operation. Safety for the machine in your shop may differ from what is provided. Always read a machine's manual for safe operations, especially if nobody in the room has machine shop experience.
General Tips
-
Let's say you have a piece of 2x1 box tube that will be cut to make 3 parts with 10" of material leftover. It is better to mark the part for one cut, do that cut, and repeat as opposed to marking everything at once then cutting. Doing this will account for the cutting device's blade thickness (known as kerf) in addition to increasing accuracy in the measurement and cutting process.
-
When making cuts it is best to be aware of the side you are keeping. Generally it is not good practice to cut exactly on the center of the line you have marked (unless that line was marked with the kerf of the tool in mind). Instead, cut more off towards the side of the stock that will not be your current part by lining the outside edge of the blade up with the line you have marked, so the thickness of the stock that the blade removes is on the side that you do not care about.
-
Think about how mistakes in precision will work out. If making two parts that are identical, think about the severity of different mistakes. Can both parts be undersized? Can one part be oversized while the other is undersized? It can be better to have two identical parts that are similarly wrong than one part that is correct with the other part being significantly off.
-
It is best to have the person who measures the part making the cuts.
-
Always make sure to clean up your parts.
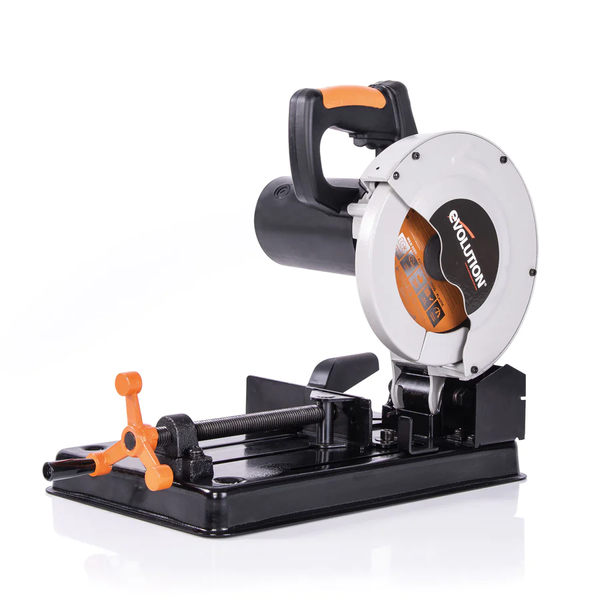
Chop Saw
A great tool for rectangular wood, hex shaft and tube stock. When purchasing a machine, make sure that it is made to be able to cut metal, avoiding abrasive cut off saws which will be gummed up by aluminum.
Start making sure the chop saw is in a safe state. It is ideal to have the saw unplugged while setting up. When safe, put your work piece in the saw. Some saws may have built in work holding while others will require the usage of a clamp. Typically, two bar clamps will suffice for machines without built-in work holding. Loosely align the cutting line with the blade then snug the work holding device against the part without preventing it from moving.
Move the blade down closer to the part for a better alignment. Make sure not to touch the blade to the part during this phase. Think about how the part was marked and where the true end of the keep piece is located, and attempt to position the end of the blade a tad bit further away from the edge of keep location, making sure to be on the non-part side. When positioned correctly clamp the part down, making sure it doesn't move the part out of alignment.
Put on hearing protection, ensure people around you are aware the machine is about to be operated, and double check that your attire is proper, making extra sure you have nothing dangling down. With one hand on the handle, power the saw on, wait for it to fully spin up, and slowly move the blade down through the stock. Do not attempt to catch the part if it will fall. Once the saw is all the way through release the power, waiting for the blade to come to a full stop before retracting. Power off the saw and retrieve your work, being wary of the area that was cut as it could be hot and/or sharp. Clean up the part.
Vertical Bandsaw/Tabletop Jigsaw
Good for cutting most stock. Some machines may prevent longer pieces of stock from being cut in one go. Round materials may be hazardous.

Many vertical bandsaws/tabletop jigsaws are made for cutting wood. Make sure that your machine is able to cut aluminum. Tabletop jigsaws will typically come with a blade designed for metals if they are able to cut metal. Vertical bandsaws for wood run at a higher RPM than recommended for aluminum. If you have nothing else they can be used, preferably with a blade made for cutting metals. This will dull blades quickly, may not be good for the machine, and will likely be less safe.
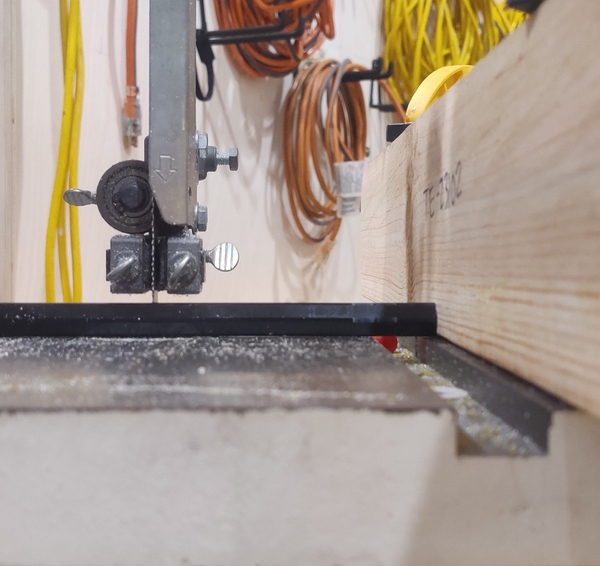
Start by making sure the machine is not plugged in or is safely powered off. Generally, these tools will be used to make straight cuts. If the desired piece of stock does not stick over the end of the machine's table it could be useful to use an alignment guide to ensure the cut is made straight and not at an angle. Some saw tables have a built in “miter gauge” that runs in a straight channel in the table that can also be adjusted to cut angles more easily.
For machines that do not have a guide preinstalled, two bar clamps, a speed square and something rectangular like tube stock or 2x4 wood can be used as a guide instead. Lightly clamp the rectangular object to the table and line it up so that the end of the work piece can be slid along side it in the correct position for the cut to be made. Once in position, use the speed square to ensure that both the front and back are square to the table and then clamp it down.
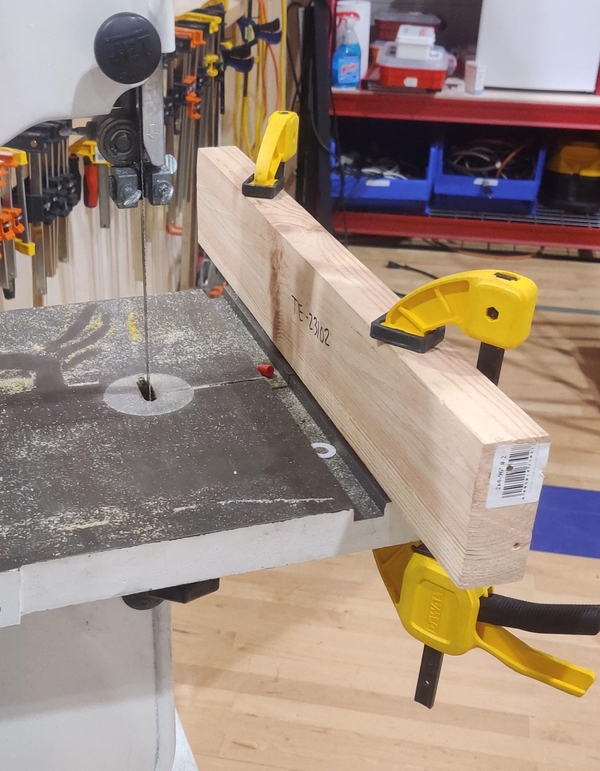
Afterwards, configure the blade guard height so that it will barely clear the material (~3/8" over). Usually, there is a knob on the back of the machine that loosens and tightens the guard.
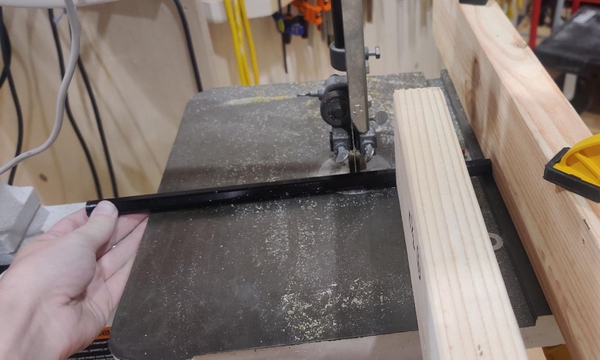
Whenever possible use a push block or push stick. A push block can be a simple scrap piece of wood that is tall enough to push the part effectively and wide/long enough to ensure safe distance between your fingers and the blade. A push stick is good when cuts must be very close to the blade. Generally, fingers should stay at least 5 inches away from the blade.
When preparing to cut, mime the action of cutting the material. Think about what can go wrong. If a finger slips, where will it end up? Where will your fingers be at the end of the cut? Is there adequate distance between your fingers and the blade? If a cut feels unsafe, it is unsafe. If a cut feels unsafe, try to find a safe way to make the cut with a push stick or block. If you cannot or do not want to find a safer configuration, please use a different machine or a hacksaw.
Before starting, ensure people around you are aware the machine is about to be operated. Double check that your attire is proper, making extra sure you have nothing dangling. Get the machine ready to start and turn on the power. Wait for the machine to reach max speed then slowly feed the material into the machine. Make progress until the part has been cut or you are unable to continue cutting. Power off the machine and wait for the blade to come to a full stop. Do not attempt to catch any part that is cut loose while the machine is on. When handling the part after cutting be aware that it may be hot and sharp, especially at the area of the cut.
Horizontal Bandsaw
Great for cutting hex shaft, box tube and circular stock.
Start by loosely aligning the cutting mark with the blade, then tighten the vise up to the part without tightening it. Lower the blade close to the part, making sure that the blade does not touch the part. Some machines are gravity fed, while others use hydraulics. If your machine uses hydraulics, lock the machine in place such that your blade is close to the part while still having some comfortable room. If your machine is gravity fed then it may be useful to have a friend hold the blade above the part if it cannot lock in a position. With the blade close to the part, align the blade with the cut mark, making sure to leave a bit of room for the width of the blade.

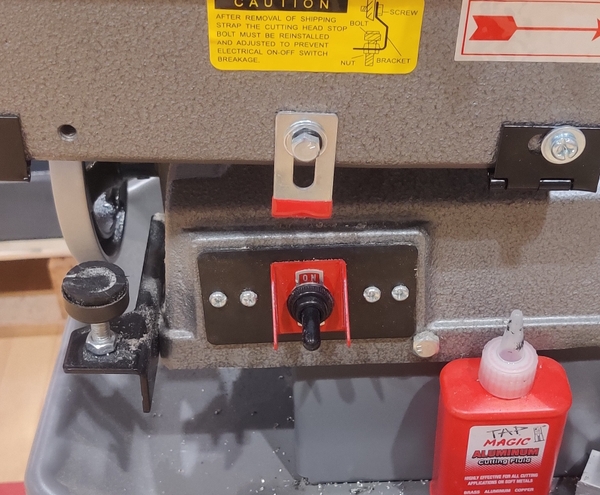
When ready, tighten the vise, making sure the part does not move. Before operation, ensure people around you are aware the machine is about to be operated and check that your attire is proper, making extra sure you have nothing dangling. Additionally, assess the state of the machine and ensure it is in proper operating condition.
In the case of a hydraulic horizontal bandsaw, lift the blade to be around two to three inches above the part, start the blade and let it descend at a slow speed. In the case of a gravity feed machine, turn the machine on and use the handle to lower the frame. Make sure that the blade is fully up to speed before contact with the material. For gravity feed machines you may apply a very light amount of downward force, but the goal is to let the teeth do most of the work. When reaching the bottom some machines will automatically shut off while others will require you to turn them off. Wait for the machine to cut fully through the part and wait for the blade to stop after it has been turned off.
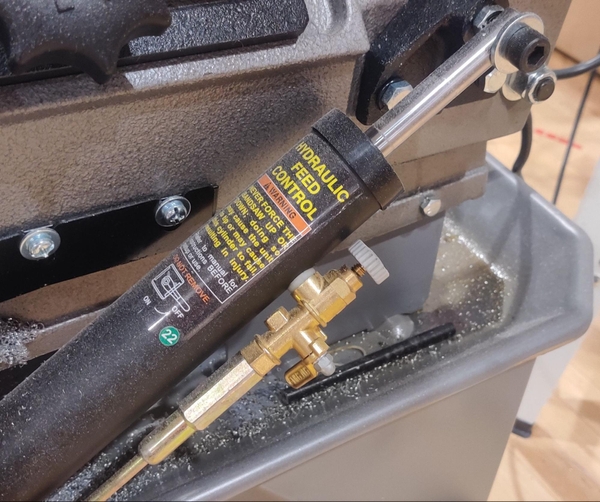
When retrieving your work, be careful of heat and sharp edges around the cut area.
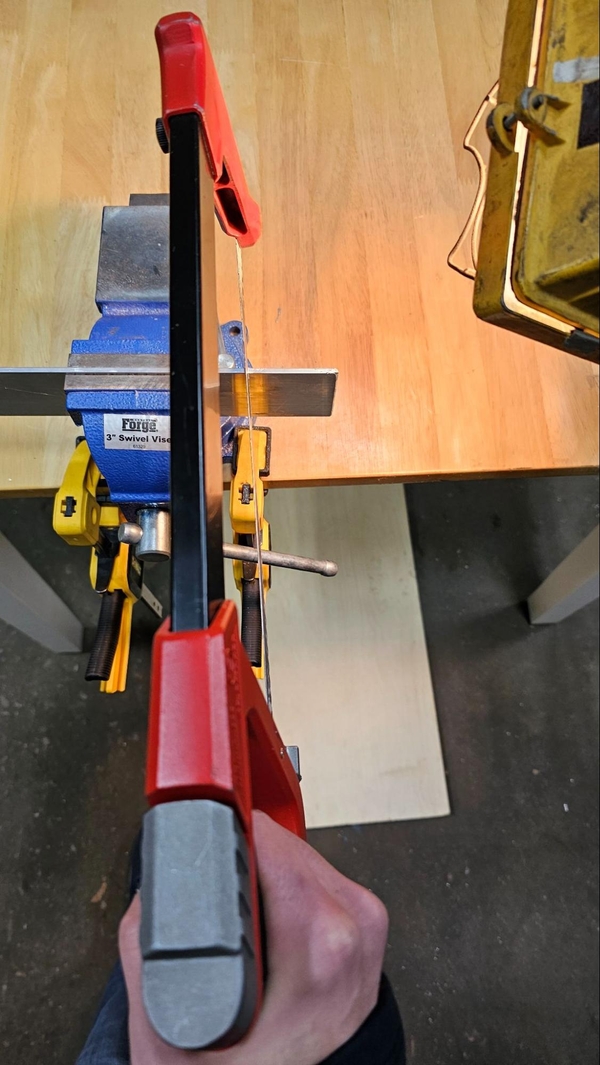
Hacksaw
A hacksaw can be used to cut almost anything for your robot at the cost of time and potentially less precision.
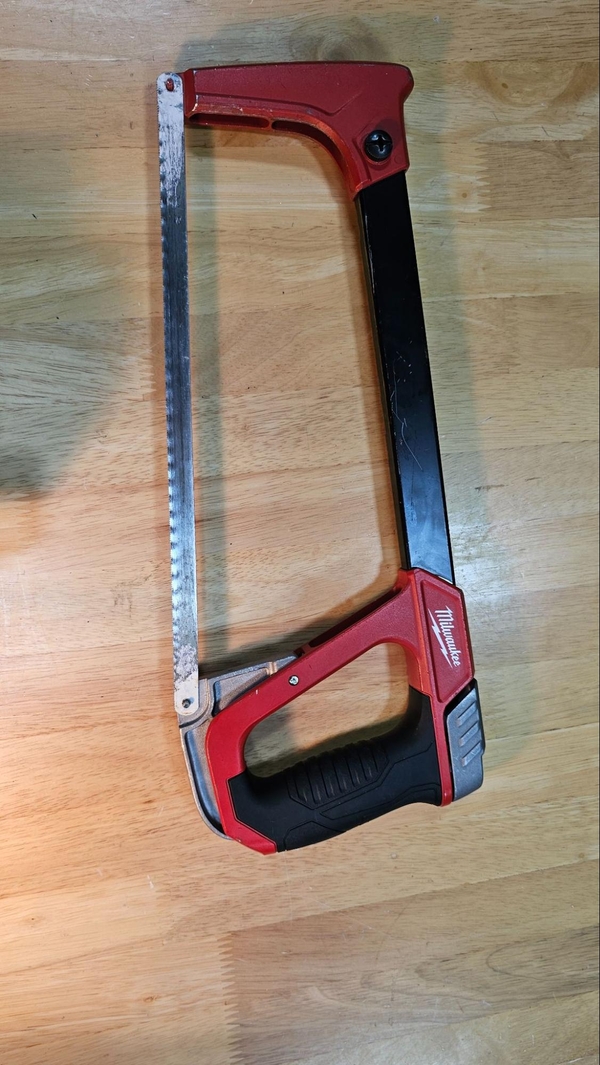
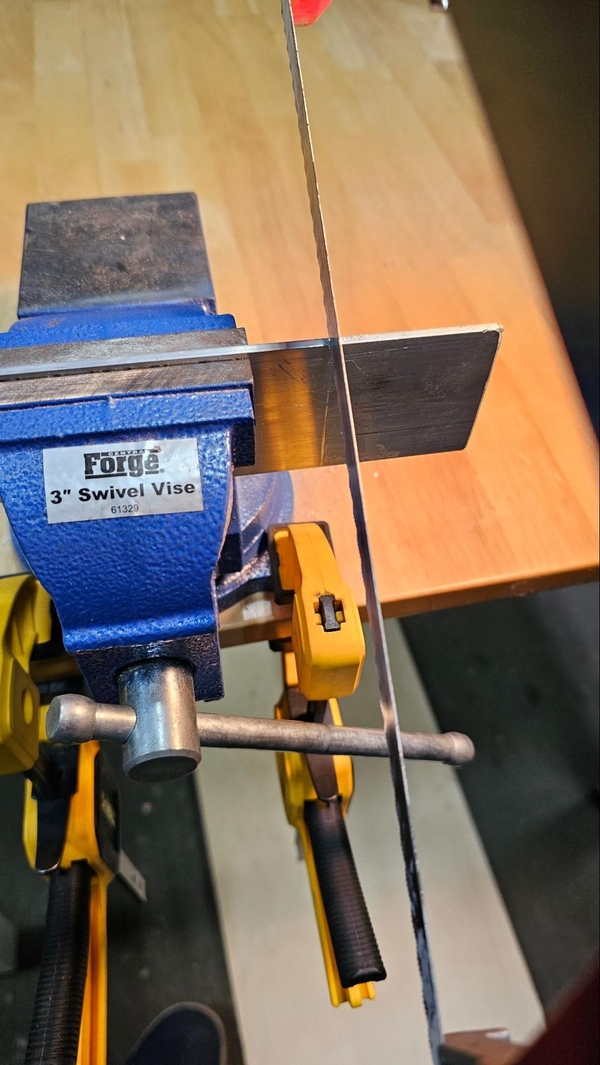
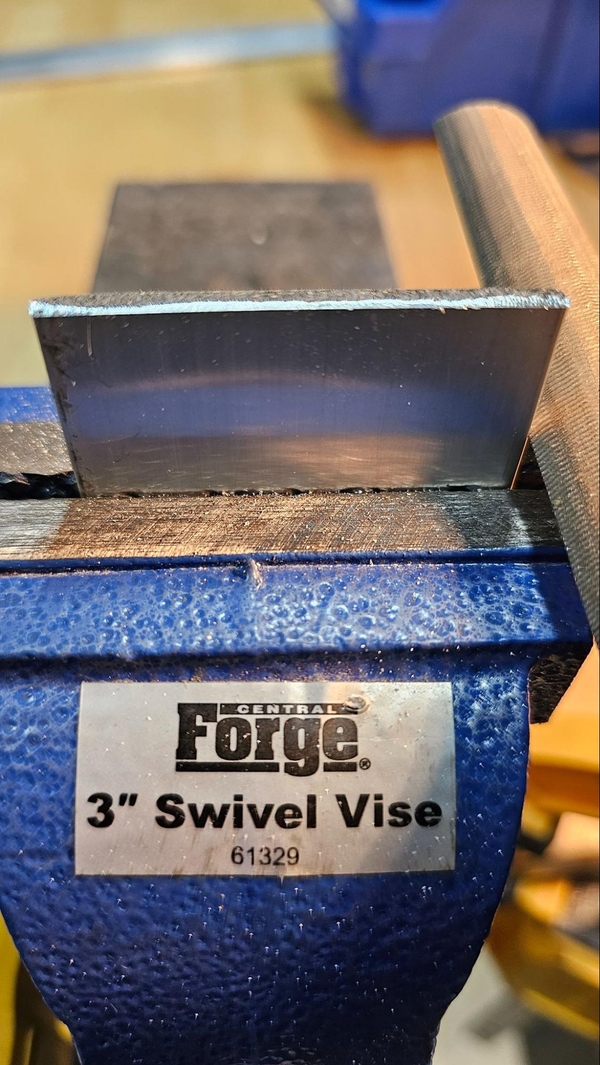
To start, make sure that your part is firmly clamped in a vice. Make sure to position the location of your cut outside of the jaws but not too far away so that the part does not flex while cutting. Typically, 1-4 inches away will work well, the closer the better.
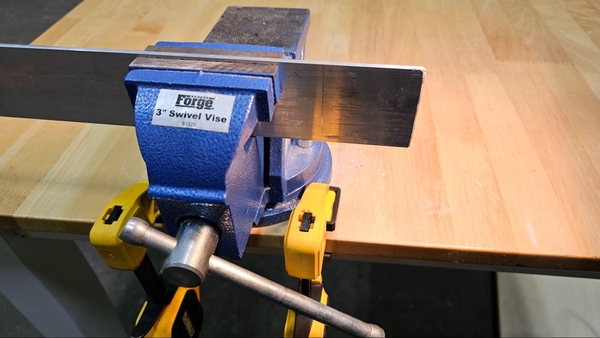
To get a straighter cut use a measuring device to ensure the bottom of the stock is the same height on the left and right of the vise. A speed square works well for this.
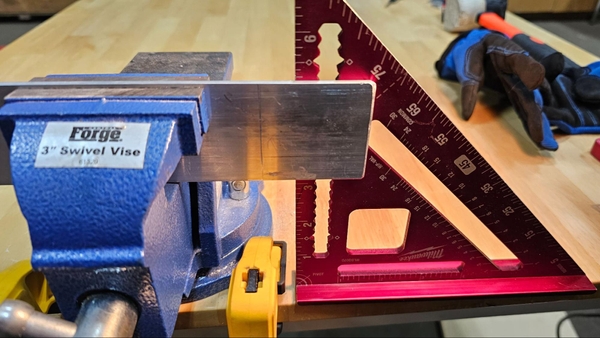
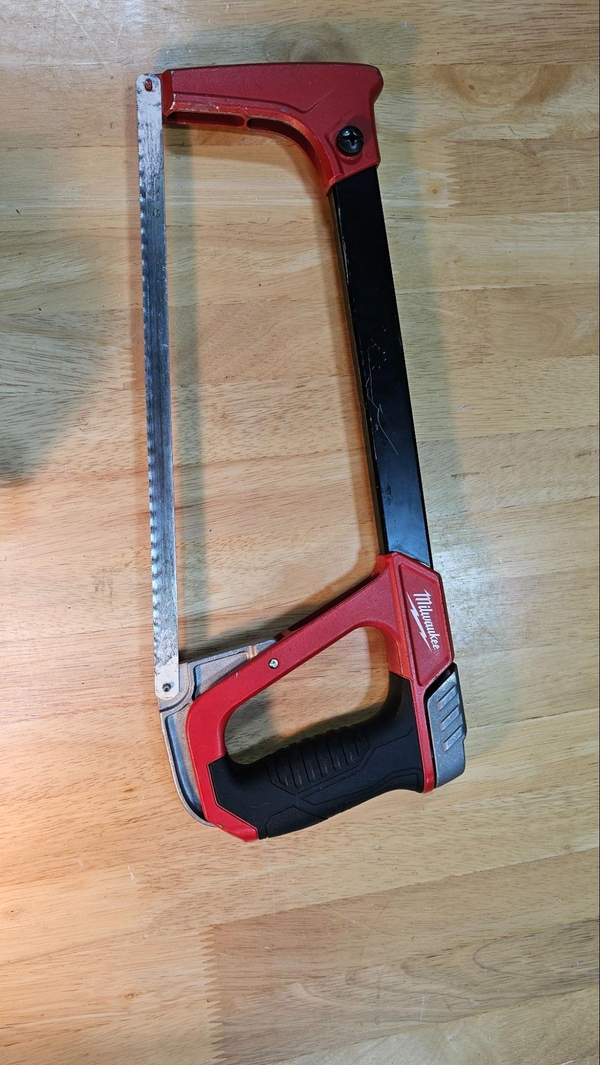
When you are ready to begin your cut, double check that your hacksaw blade is tensioned correctly. The blade should be tight with little side to side wiggle but make sure not to over tighten the blade. In the pictured hacksaw’s case the tightening device is just above the handle.
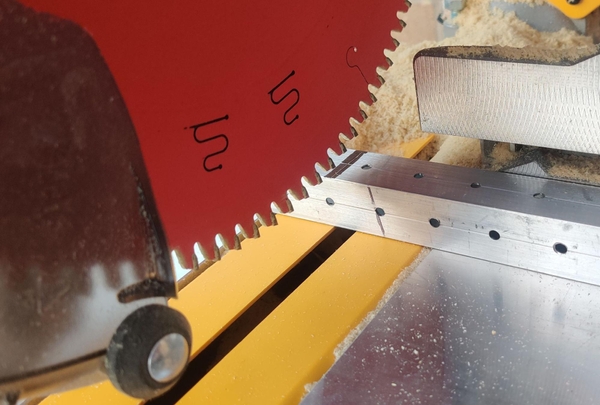
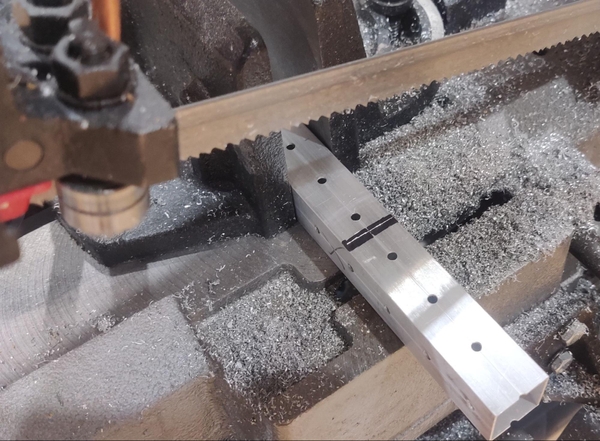
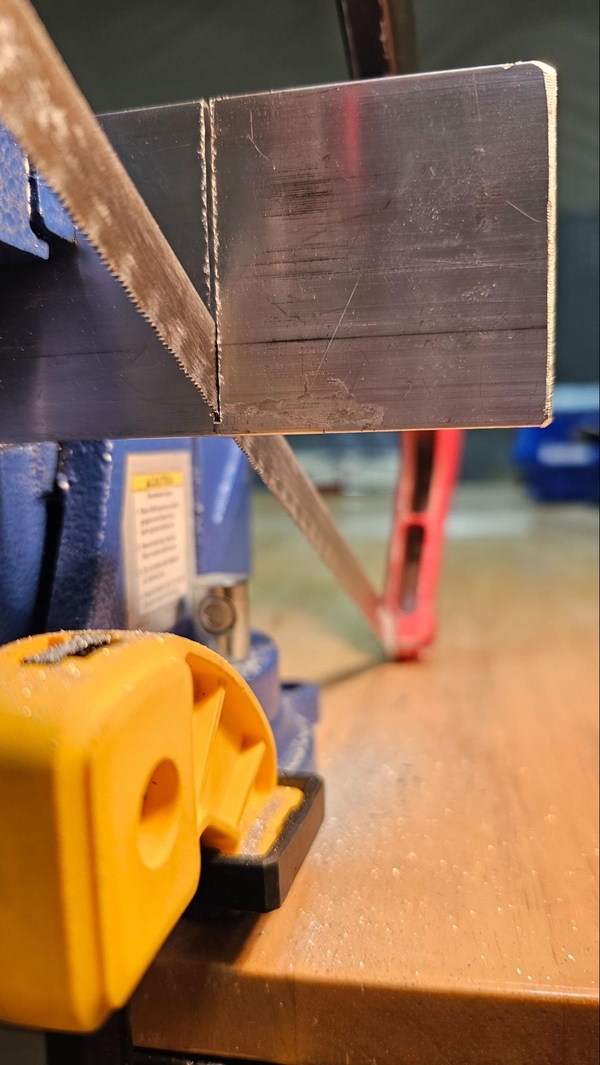
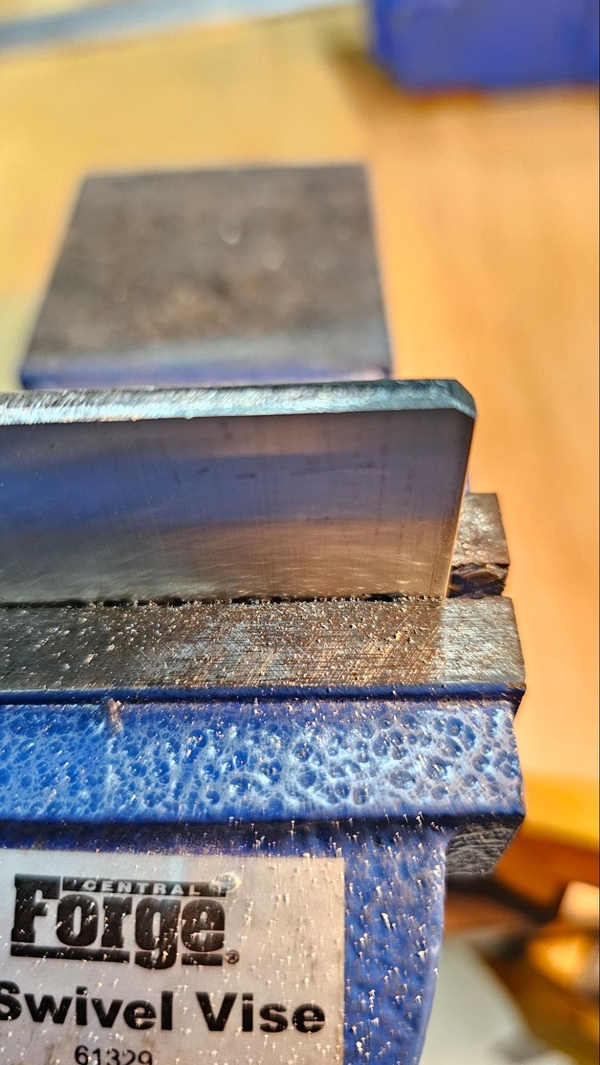
Cuts cannot be undone, and a hacksaw can wander if proper attention is not given. Like with other cutting tools, be sure to account for the material the blade will remove by positioning the hacksaw to the side of the cut line we do not want to keep. Cutting exactly on a scribed line will result in the part being undersized.
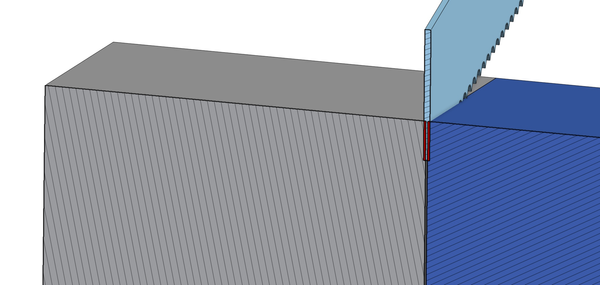
In this image, the grey side of the stock is the “keep” side while the blue side is the offcut. The red portion of the blade shows where the saw blade intersects with both the keep and non-keep portions of the stock when cutting directly over the scribed line. If you instead line the edge of the blade up with the non-keep side of the scribe mark and then add a small amount of room for cutting error, the material that the blade removes will all be on the offcut side of the stock and the keep side should be the correct length.
The example images show cutting on the line for visual clarity to show a decent cut.
The start is the most important part of the cut. Make sure that your blade is perpendicular to the part. For parts that are made from flat material, start your cut on the edge instead of across an entire face. In general when starting find an area like this for the least resistance to create a grove. Make sure to keep the blade as steady up and down as possible, if the cut line is not straight up and down it will be hard to correct later on. Angle the blade ~20 degrees with the edge and attempt to make a grove. It could be useful to hold a piece of wood on one side as a guide to make sure the blade does not walk.

Once the grove has been started, keep the blade straight and use long strokes. When cutting through tube stock, the ceiling and floor walls are easiest at an angle but generally the tool should be parallel with the floor. Let the blades do most of the work, use light pressure at most for the straightest cut. When cutting, think about the two axes that need to be kept straight, the bar at the top can be rotated such that it is left or right of the blade. The handle could also not be straight with the end of the blade relative to the part.

Top bar is rotated to the left Handle is shifted to the right
If you notice that you have deviated from your desired line then you may be able to bias the hacksaw in the opposite direction so that it cuts straight again, but that shift may cause some binding between the blade and the walls of the existing cut. If done correctly, you can still get a relatively straight line. When the part is hanging on by a small tab the hanging side of the cut may start to droop or drop off with part of the tab still intact. This can be filed off later. The cut part may be hot and the sawed edges will probably be sharp.

Cleaning Up The Part
After a part is cut it may not be exactly flat and it will have burrs that need to be removed as they could cut someone when trying to attach the component to an assembly.
Filing
A common method for deburring a work piece is a file. Metal files are designed to function best in one direction.
When deburring an edge, push the file away from you and across the part in a single long motion. Pick the file up from the surface of the edge and bring it back towards you, and then place it back on the part and push it away from you again.
If filing down a larger surface, place the part in a vise, keep the file level and apply equal pressure on both sides of the file using two hands.
Filling all parts and edges is generally good. A corner that will be exposed when assembled must be filed, as the corners can catch on people and clothing and are generally sharper than edges.
A file can also be used to slightly shorten a part by shaving it down if it was made slightly too long.
The file should routinely be cleaned with a file card or chip brush (paint brush) to remove the metal chips that build up in its cavities.
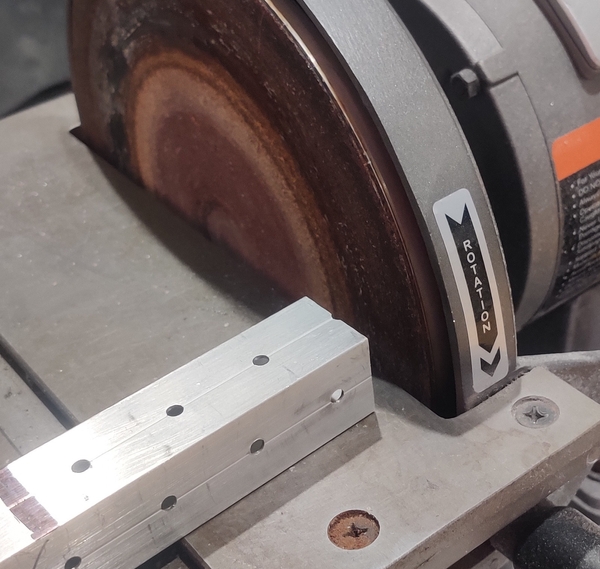
Belt Sander
NEVER WEAR GLOVES WHILE USING AN ELECTRIC SANDER. The glove becomes an extension of your hand which has no feeling and is larger than your body and brain expect your hand to be, making it more likely that the glove and your hand will be pulled into the machine by accidentally contacting it.
Belt sanders come in a few different styles with belts usually starting at 1” wide and going up from there. Some sanders will also have a disc-style sander built into the same machine.
Typically belt sanders will have a table. Your work piece should be held down against the table whenever sandering to help prevent the sander from grabbing the piece and pulling it and your hands into the machine. Some tables can be angled but generally it is easier to angle a part against the flat table if you do not specifically care about the angle that the sander grinds into the work piece. When the sander is turned on, the belt will run from the top to the bottom, pushing the piece down into the table. When using a disc sander, use the side of the disc that is rotating down into the table so that the sander is pushing the piece down into it instead of trying to lift it up and out of your hands.
There are three common operations that will be performed on the belt sander: deburring, flattening an edge, and removing a small amount of length from a part.
For deburring edges, use a ~30 degree angle and move the part from side to side to remove the burrs. Sometimes this angle might have to be more aggressive, use a file instead if this is the case. This should happen very quickly. Be careful, some tables may have a decent gap between the table and belt which your part could be shot through. If this is the case, use a metal hand file instead.
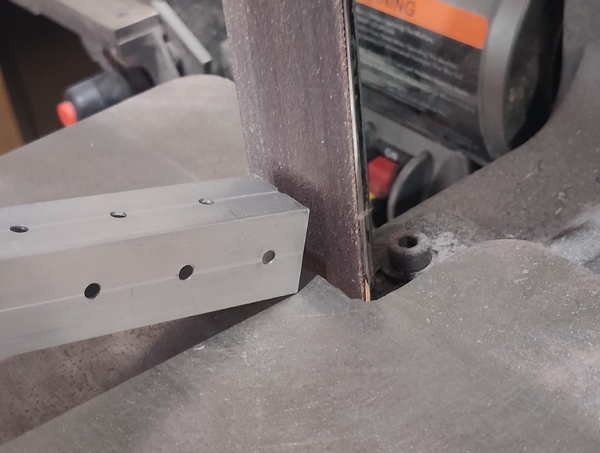
When flattening a face, keep the part flat against the table and if there is room continuously move the part from side to side on the belt’s surface. Make sure that the part is flat on the table and perpendicular to the belt. A short amount of time should be all that is needed to flatten a component’s face.
Removing material will work just like flattening but with more time up against the sanding belt to remove more material. The part may begin to heat up during this operation. A pair of vise grips, which are basically a type of adjustable locking pliers, to hold onto most parts (work pieces may be grabbed and flung out of regular pliers, making them an unsafe choice). Make sure to measure your workpiece periodically so that you do not over do the sanding and make the piece too short.